

Table of contents
To be honest, this article isn’t generated by hashmind 😅 even if i created a tool that could do this.
Writing is hard 😔.
If theres one thing we all need to know is that, writing is hard, coming up with well written article that clearly aligns with users perspective is a tedious task. Staring at that blinking cursor continually makes the process even harder to deal with, but that shouldn’t be the case any longer with this new project called Hashmind.
What hashmind? well let not be in a haste 😀, let first talk about how hashmind was born and what problems and setbacks that was faced while building this. So get your popcorn ready, your coffee, relax and enjoy.
The Problem 😭
You see, i’ve always wished to have a personal assistant ( maybe an AI friend who knows ) , an assistant that capable of understanding my thoughts, ideas, and goals, and helping me transform them into well-crafted articles. I wanted a companion who could provide suggestions, offer insights, and even assist with the writing process itself. That's when the idea for Hashmind was born.
I know you’re probably wondering that what chatgpt is capable of doing. but you see, chatgpt kind of suck at this area. You would have to rewrite, rephrase, correct your words when chatting with this AI which can be cumbersome ( probably what we engineering folks calls prompt engineering ). Not until it gives you some ideas and keypoints and asks you to complete the article ( you get personal homework assignment from an AI 💀 ).

We’ve always find ourselves wishing we could publish articles from notion, being one of the most productive tool out there.
This are some of the pain points that inspired the creation of Hashmind. With Hashmind, you can seamlessly integrate your writing process with Notion, one of the most popular and productive tools available. It provides you with a companion that understands your thoughts, ideas, and goals, assisting you in transforming them into well-crafted articles. You also get to generate your article in whatever Author style you want.
The Challenges 🔥
The path to creating Hashmind was no walk in the park. Technical challenges, doubts, and countless revisions—it was a rollercoaster ride. This might be one of the complex project i’ve built in 2024, i’m not referring to complexity on an engineering perspective ( well this too also played it part ), but complexity in using some unfamiliar technologies I haven’t used in a while.
But every setback fuelled the determination to create a tool that revolutionises the writing experience.
Some of the challenges I faced during it development was basically:
Crafting and refining the initial idea, which proved to be a crucial and time-consuming process.
Selecting technologies that not only enhance developer experience but also enable swift completion of the app, despite joining the hackathon later.
Seamlessly integrating voice recognition technology into the platform for a more immersive user experience.
Deciphering how to discern user intentions for blog actions like creating, updating, or deleting content.
Exploring optimal user experiences for article generation and updates.
These hurdles, along with many others I'm currently too exhausted to recall, were integral parts of the development journey.
The challenges faced during the development of Hashmind were overcome through perseverance and determination. Crafting and refining the initial idea took time and effort, and selecting the right technologies was crucial for a swift completion of the app. Integrating voice recognition technology and deciphering user intentions added complexity to the project.
The Birth of Hashmind 🕊
After so-many countless sleepless nights trying to debug and decipher this in production and development, I finally figured out what need to be done.
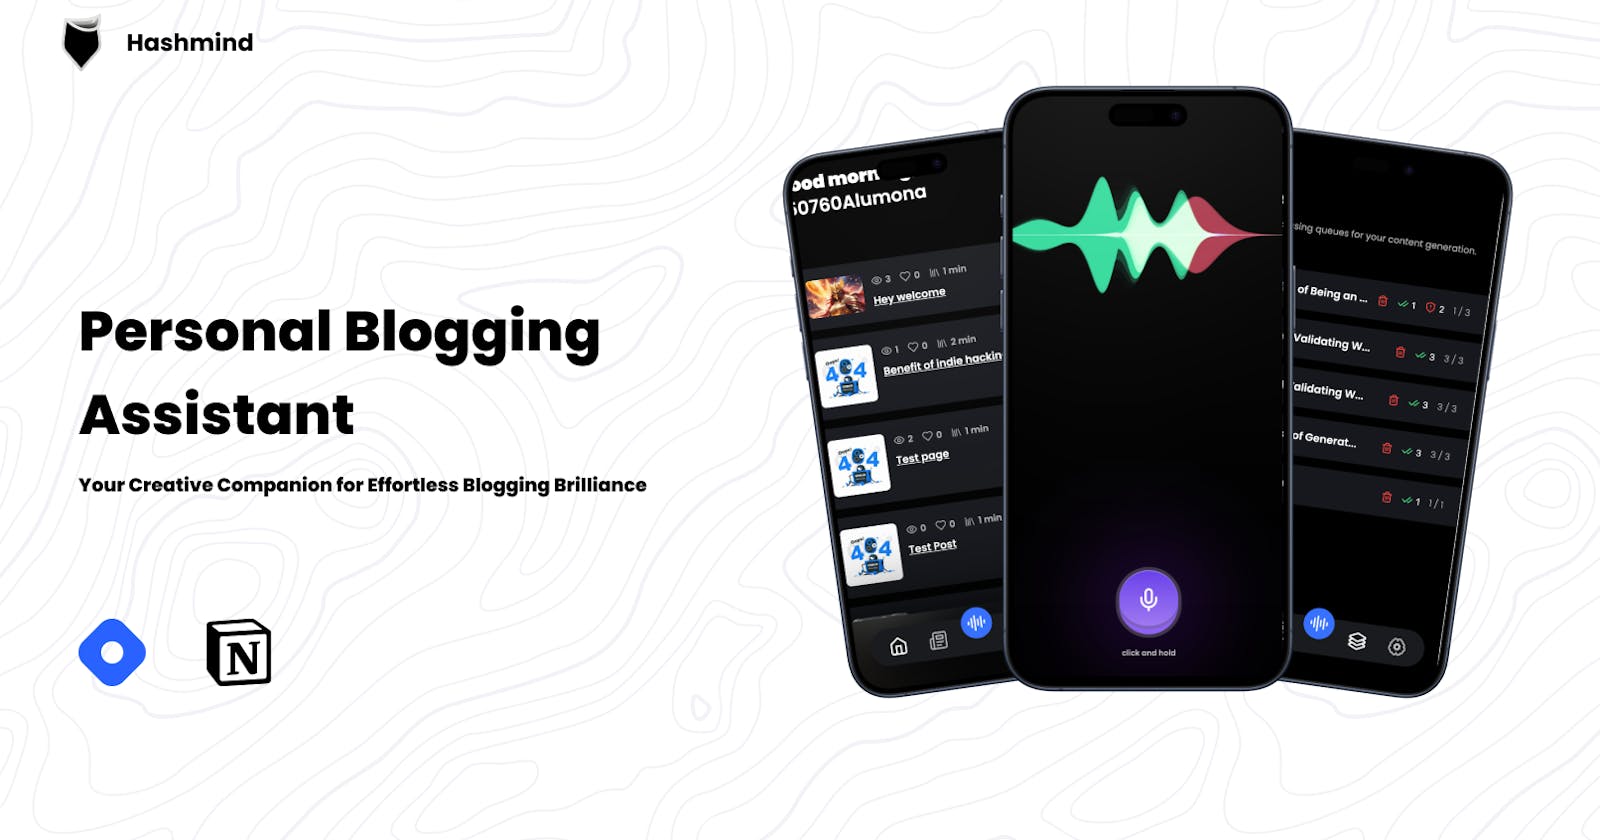
This is the birth of Hashmind - Your personal blogging companion.
Enough talking, get your headphone ready and watch the video below on hashmind.
Hashmind was born out of the need to simplify the process in which articles where being generated. If you’re someone who just need a concise article outline on a specific idea or topic, then hashmind was created for that purpose. Or probably, you’re looking for a seamless need to publish an article from notion to hashnode ( or to other platform coming soon ), hashmind is your guy.
How it works? 🤔
You’re probably wondering how hashmind works on the technical level. Well before I dive into the technical needy greedy of hashmind, let see how hashmind works on a high level. As you may know, hashmind relies on powerful hashnode graphql api and notion api so which implies, hashmind would infact need some details / info from users making use of this platforms.
let brake it down:
Authentication 🔑:
Signin using your google account powered by clerk. this is the gateway.
Connect Hashnode: This is the phase where we collect some information from users making use of hashnode as their prefer blogging platform. We would need (Publication ID & Token) from hashnode users.
Authorize Notion: If you want hashmind to publish your article from notion to hashnode, then you would no doubt have to connect your notion workspace to hashmind.
Content Generation 📜
This is the brain of hashmind. once you’ve successfully linked those requirements from hashnode and notion, then you can probably start making use of this feature
Speech-to-Text: Users should be able to communicate with the AI using spoken words and the AI should in turn be able to understand their words. This is the gateway toward using hashmind in generating content.
Text-to-Speech: Users should be able to listen to the AI-generated content in a natural and human-like voice. This feature enhances the user experience and provides a convenient way to consume the generated articles.
Actions: Behind the scenes, Hashmind utilizes OpenAI function calling to determine and classify actions based on a given prompt. Consider OpenAI function calling as the orchestration mechanism that directs Hashmind's responses and functionalities. (more details in the development section)
Create: Based on this action, we discern the user's intent to initiate content generation or creation using Hashmind.
Update: Hashmind intelligently recognizes cues indicating the user's desire to modify or refine existing content.
Delete: In response to this action, Hashmind identifies signals suggesting the user's intention to remove or discard content.
Notion-to-Hashnode 🚀: In a straightforward process, Hashmind navigates the user's connected Notion workspace, detecting the presence of dedicated databases created through the integration. Subsequently, Hashmind fetches the database properties and seamlessly synchronizes the content with Hashnode using the Hashnode GraphQL API only if the user clicks on the synchronize button.
This is pretty much how hashmind works on a layman level, now it time for the juicy side of things if you enjoy technical details and love solving bugs for 3days that resulted as an account of logging prisma connection client in the terminal 🤦♂️
Development phase 🧑💻
Before I proceed towards the development of hashmind and how the whole functionalities where atleast put up in the correct steps, let discuss about the tech stacks used in this project and how and why i choose to use this technology.
Tech Stacks 📚
Hashmind is powered by lot of technologies behind the scenes, but would do well to keep it simple.
Nextjs ( App router ) - Main client and serverside framework
Tailwindcss
Mongodb
Prisma ORM
Clerk - authentication
Open AI (gpt-3.5-turbo) kind of broke and couldn’t afford gpt4
Google Cloud - Text-to-speech
Openai Whisper - Speech-to-text ( transcribing )
Stability AI - Image Generation.
Clodinary - Media storage
Inngest - Serverless background jobs and queues workflow
Docker
Redis via Upstash
Hashnode Graphql API
Notion API
Vercel - deployment platform.
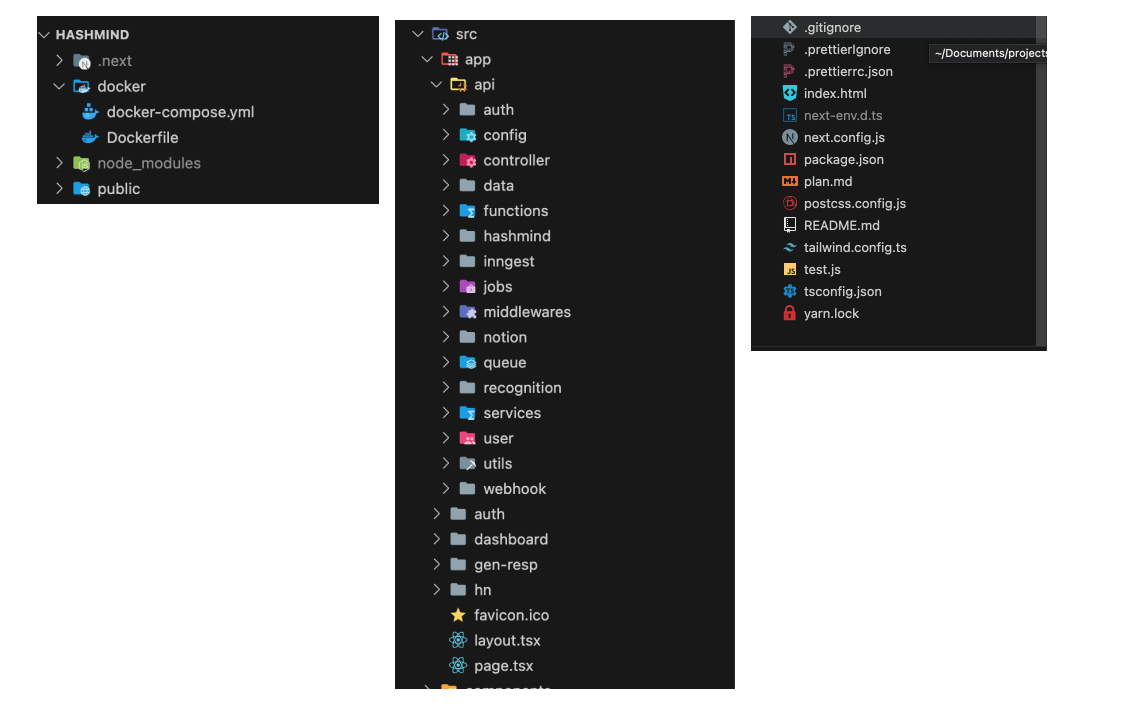
Folder structure (not that you might need it, just for those who cares)
I know you might probably wonder why I didn’t go for the Nodejs/Express stack.. Well, let me put it straight.. Simplicity. I want to keep things as simple as possible and not focus on unnecessary complexity during deployment.
I dont want to manage my own custom server just for this small mini project considering how broke I am, which is why i decided to keep things the serverless way.
What inngest? Well think of inngest as an alternative to Bullmq, Agenda, Queue for background job processing and event driven architecture.. I initially thought of using bullmq for custom background jobs and events, but the catch was ( it currently not supported with nextjs atleast the last time i checked and was made specifically for nodejs env ) so which is why i opt-in out for inngest, plus the developer experience is kind of dope. being able to retry all failed jobs from the ui is kind of cool.
Hey there! You mentioned using Hashnode GraphQL API, right?
Absolutely! So, why didn't you choose Apollo Client/Server? Well, it's all about Simplicity! If I can achieve the same functionalities with REST API as in GraphQL schema, why complicate things? I aim to keep it straightforward to ensure a smooth Developer Experience (DX) without unnecessary complexities holding me back.
It high time i discuss how some of the features kind of works on a developer perspective.
Content Generation 📜
This is probably one of the phase that took me some time to figure out how to put the pieces together, but was worth it in the end.
Content generation in hashmind works in 3-4 phases. first let discuss one of those phase which is IdentifyingAction.
This is one of the main important phase which would lead to other phase.
IdentifyingAction 🔑
This process involves identifying the action requested by the user based on the given prompt. By utilizing OpenAI function calling, Hashmind analyzes the user's input and classifies it as a create, update, or delete action. This step helps Hashmind understand the user's intentions and directs its responses and functionalities accordingly.
For example, let assume a user tries creating a content with the provided prompt
Hi, i've being stressed out a little bit. I need you to compose an article with the title The differences between uploaded intelligence and artificial intelligence.
As you can see from the prompt, we know from a human standpoint that the:
title is The difference between uploaded vs artificial intelligence , and we can also tell the user would wanna CREATE a blog ..etc
The catch is, If you were to feed this prompt to regular openai chatcompletion model even with some custom prompt engineering, there’s a possibilities of the AI marking this as Update or even ADD as the action and returning all this as a string which would be much more difficult for us to decipher properly even when we choose to write a custom parser, which I wouldn’t wanna do ATM, would you? i’m pretty sure your answer is No, well if it yes, then good luck and may the forces be with you.

This is where Function Calling comes into play. Well before I explain what this word is, let use an example. You must have probably seen a chatbot where when you ask it some questions like “What the weather like in new york?” or perhaps “Book a flight from Las vegas to Carlifonia”. How does the AI able to extract the meaning of this question? well you might think vector similarity search is actually being in used, well you might be right in some cases, but as for this particular scenario, similarity search can’t be used as you would also need to extract some keywords alongside like the Locations (to and fro) and the action such as Book or Cancel.
This is the power of function calling. Function calling allows developers to interract with AI model in a more systematic way where the model doesn’t just extract the meaning from the sentence or prompt but as well extract the keywords i also able to respond in JSON format.

This is how hashmind does the identifying action function, a custom function is created for this purpose as seen below:
const response = await openai.chat.completions.create({
      model: "gpt-3.5-turbo-1106",
      messages,
      tools: [
        {
          type: "function",
          function: {
            name: "identify_action",
            description:
              `Identify users intent or action from the given prompt. Actions must be returned in one word, all caps, and underscored. Also, the title and subtitle and emoji must be returned if available.
              Also, Identify users intent or action from the given prompt. You need to decide from the given prompt if they want to update either (title, subtitle, cover image, content) or not.
              `,
            parameters: {
              type: "object",
              properties: {
                action: {
                  type: "string",
                  description: `The user request action gotten from the prompt, supported actions are ${supportedActions.join(
                    ""
                  )}`,
                },
                title: {
                  type: "string",
                  description:
                    "The title of the article (this could be the article title the user would like to generate an article with or this could be the old article title if user would like to update the title).Extract the title from the prompt if available and make sure to be short and concise. This is very important, it must not be empty. Make it short maximum 50 characters",
                },
                subtitle: {
                  type: "string",
                  description:
                    "Extract the subtitle from the prompt. Make it short maximum 50 characters. This is very important, it must not be empty",
                },
                keywords: {
                  type: "string",
                  description:
                    "Extract keywords from the prompt and return them as a string separated by comma. Make sure no duplicate are found within the keywords and that the keywords are meaningful and not random.",
                },
                updateTitle: {
                  type: "string",
                  description:
                    "Determine if the user wants to update the title of the article, if they need to update the title, add the new title as value. return null if not",
                },
                updateContent: {
                  type: "string",
                  description:
                    "Determine if the user wants to update the title of the blog post. return null if not",
                },
                updateSubtitle: {
                  type: "string",
                  description:
                    "Determine if the user wants to update the subtitle of the blog post. return null if not",
                },
                updateCoverImage: {
                  type: "string",
                  description:
                    "Determine if the user wants to update the cover image of the article, if they requested one, extract the keywords of what they need the image to be, otherwise use the extracted keywords from the identify_action function. return null if not",
                },
                updateContentNotation: {
                  type: "string",
                  description: `Determine what the user want to perform on the article content. Possible notations are ${updateBlogContentNotation.join(
                    ","
                  )}. Return the notation that best suites the user request.`,
                },
              },
              required: ["action", "title", "subtitle", "emoji", "keywords", "updateTitle",
                "updateContent",
                "updateSubtitle",
                "updateContentNotation",],
            },
          },
        }
      ],
      tool_choice: "auto", // auto is default, but we'll be explicit
    });
You would notice the tools properties is an array of objects where each objects is a function, this also implies a function can be invoked in parallel. for eg, you could have a function to check extract the locations and actions from prompt.
In my case, this specific function is basically mean’t to identify the users prompt action, title, subtitle, keywords, upateTitle, updateContent, updateContentNotation …etc this properties is how we simply identify what the user would like hashmind to do. Also, notice we injected supported actions to the prompt been feed into the AI, this is because, I need the AI to specifically return the action that exists in the lists of supported actions and nothing aside that should be returned.
const supportedActions = ["CREATE_BLOG", "UPDATE_BLOG", "DELETE_BLOG"];
What does the response look like from this function which identifies users action, here is an example function calling response:
{
  functions: [ 'identify_action' ],
  error: null,
  action: 'CREATE_BLOG',
  title: 'Building and Validating Web Endpoints with Fiber in Golang',
  emoji: '🌐',
  subtitle: 'A Comprehensive Guide to Building Robust Web APIs',
  keywords: 'Fiber, Golang, Web Endpoints, Validation, Web APIs',
  aiMsg: null,
  updateTitle: null,
  updateContent: null,
  updateSubtitle: null,
  updateContentNotation: 'ADD'
}
As you can see, this is basically what we need to create the content / articles the user requested for. the properties having the prefix of update would only be used if the action is UPDATE_BLOG or anything between the update word which is why most of the properties are null since we basically dont wanna update a specific article.
Notice the object contains aiMsg property? well that basically how we tell if the AI is having some general conversation and no action is invoked. If the property isn’t null, then we simply send the content to google cloud text-to-speech service, which returns the result in base64 string which we can then send over to the client.
But how are the content generated based on this properties? Good question mate, let discuss that next.
Event Driven Architecture 🛠
Before we proceed, let have a high general overview of what the architecture of hashmind looks like.

The diagram is quite self-explanatory, encompassing our discussion. It all starts with a user request sent to the backend server. The server then invokes OpenAI Whisper to convert the audio_base64 string into readable words. These words are used to prompt the function responsible for processing user requests. This function, in turn, calls the identifyAction function to discern the user's intent.
Here is how we invoke one of the background inngest functions available.
This code below is basically the entry point towards how inngest keeps track of the background functions we would execute in future.
import { serve } from "inngest/next";
import { inngest } from "@/app/api/config/inngest_client";

...

export const { GET, POST, PUT } = serve({
  client: inngest,
  functions: [
    inngest_hashmind_main_function,
    inngest_article_coverimage_generation_function,
    inngest_article_content_generation_function,
    inngest_publish_article_function,
    inngest_update_article_content_function,
    inngest_update_article_coverImage_function,
    inngest_update_article_title_function,
    inngest_delete_article_function,
  ],
});
While this code below shows how one of the function is created and ready to be invoked.
export const inngest_hashmind_main_function = inngest.createFunction(
  {
    id: "hashmind-main-function",
  },
  { event: "hashmind/main" },
  async ({ event, step }) => {
    // invoke article coverimage generation function first
    await step.invoke("hashmind/article-coverimage.creation", {
      function: inngest_article_coverimage_generation_function,
      data: {
        subtitle: event.data.subtitle,
        keywords: event.data.keywords,
        userId: event.data.userId,
        title: event.data.title,
        jobId: event.data.jobId,
      },
    });

    return {};
  }
);

...
// other functions below
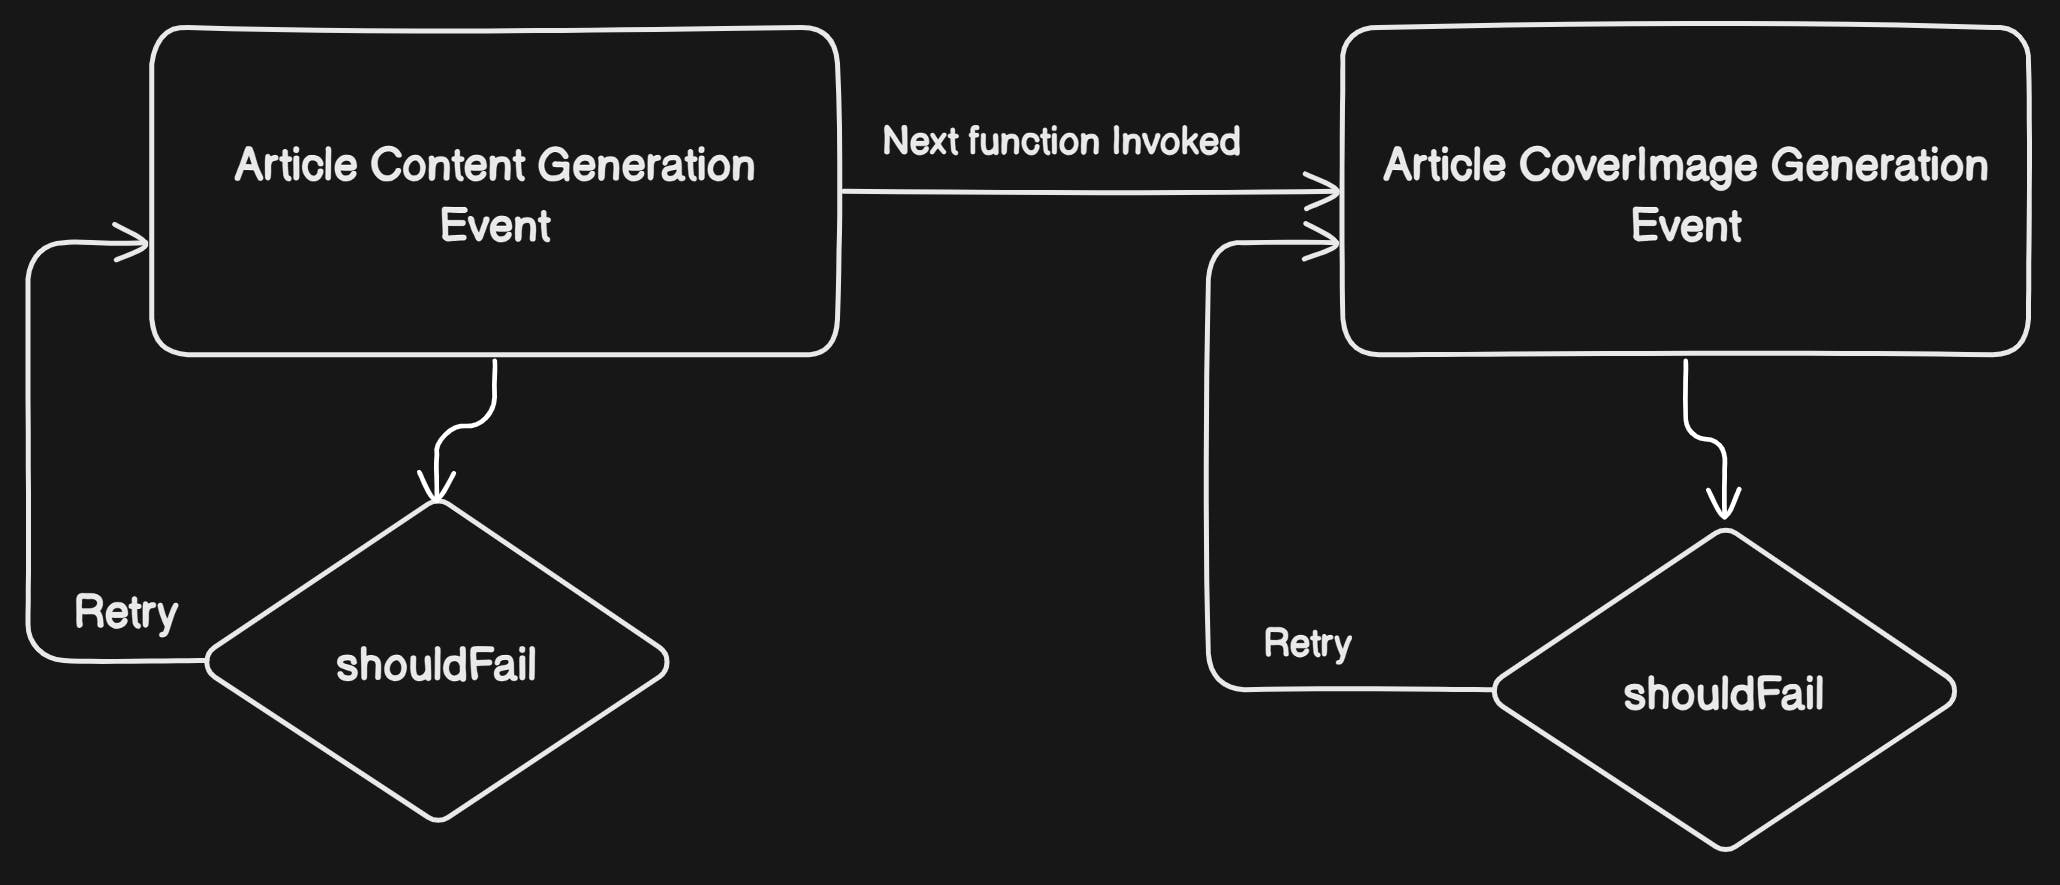
On a high level, this functions are capable of retrying theirselves if it fails, has shown in the image below:
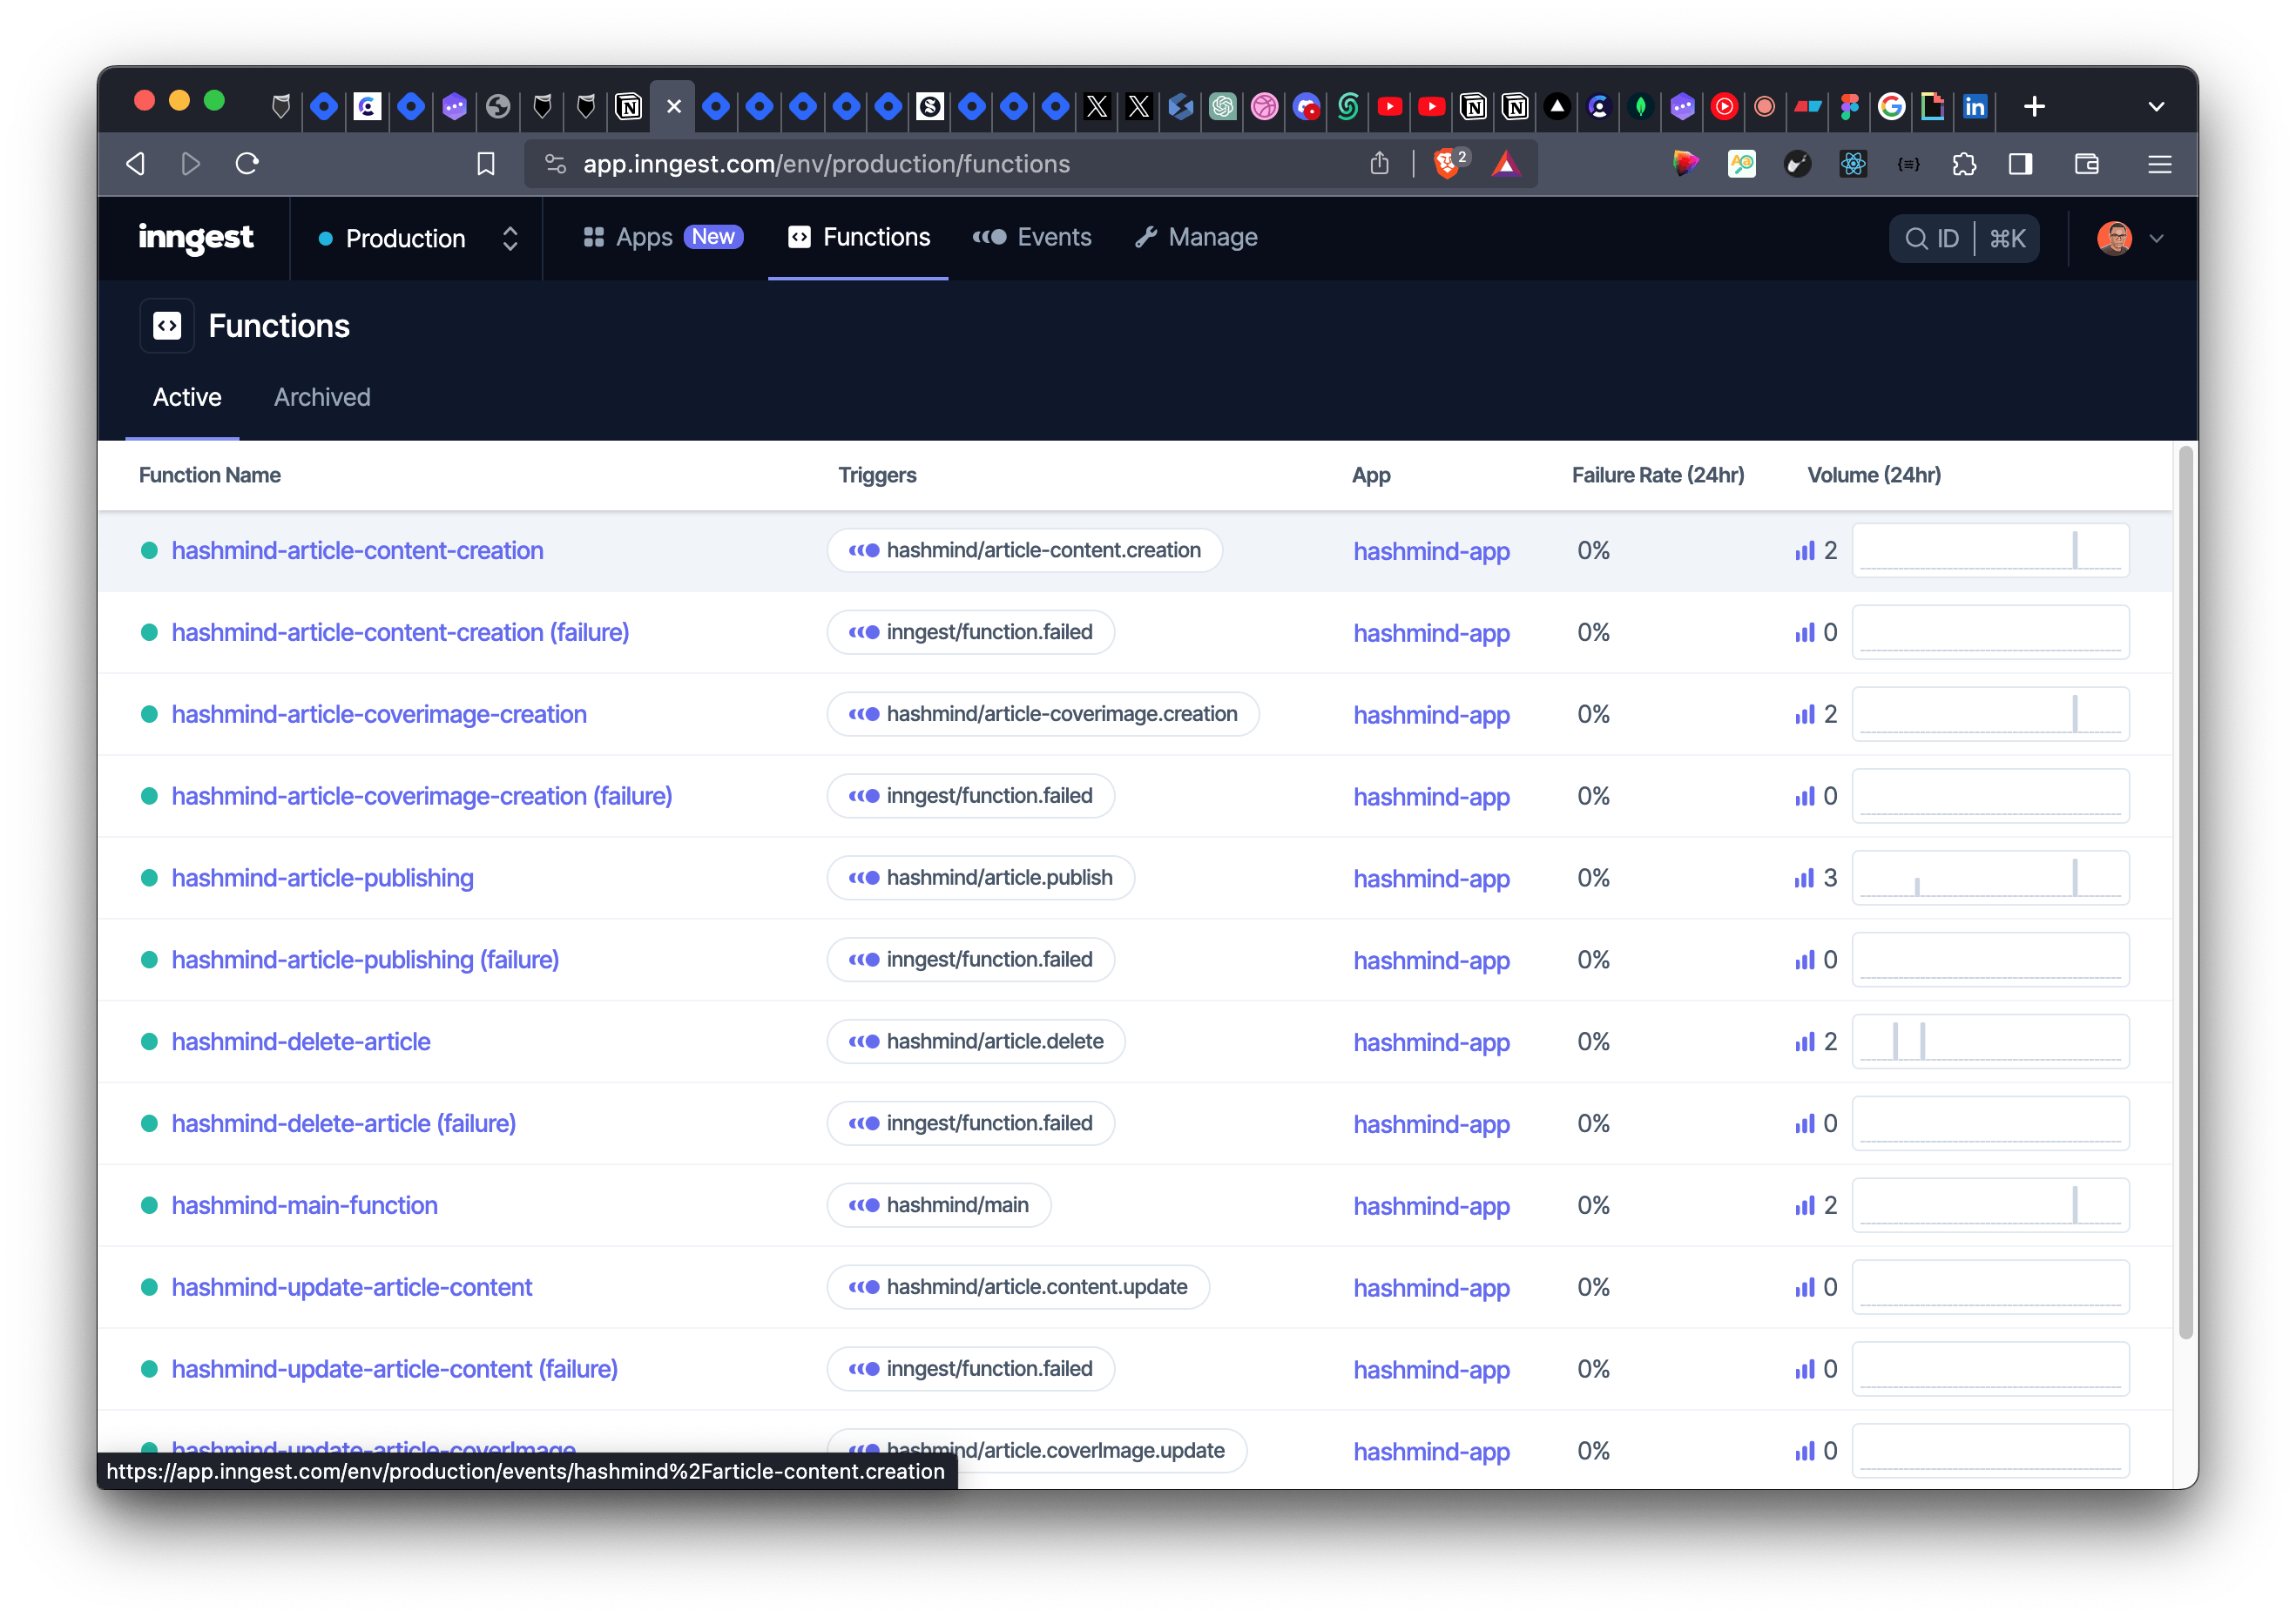
Inngest provides a better UI to monitor and track each of this jobs as seen in the image below
Publishing Article to Hashnode
Once the function mean’t for
publishingArticleis invoked, we simply do some checking’s and simply call thehashnodeServicemethod responsible for handling that as seen below:const publishArticle = await hashnodeService.createPost({ title: title as string, subtitle: subtitle as string, contentMarkdown: content as string, slug, apiKey: user?.settings?.hashnode_token as string, publicationId: user?.settings?.hashnode_pub_id as string, coverImageOptions: { coverImageURL: coverImage as string, }, metaTags: { title: title as string, description: subtitle as string, image: coverImage as string, }, tags: [{ id: hashnodeTagId }], });This is basically the last event that get called during the article generation phase which is why we have access to the
content,title,coverImageUrl..etcThe code below shows the method responsible for publishing article to hashnode
 async createPost({
     title,
     subtitle,
     contentMarkdown,
     slug,
     publicationId,
     apiKey,
     ...config
   }: CreatePostType) {
     if (!apiKey || !publicationId) {
       throw new HttpException(
         RESPONSE_CODE.ERROR_CREATING_POST,
         `Unauthorized, missing api key or publication id`,
         401
       );
     }

     const funcResp: FuncResp = { error: null, success: null, data: null };
     try {
       const reqBody = {
         query: `mutation PublishPost($input: PublishPostInput!) {
             publishPost(input: $input) {
               post {
                 id
                 url
                 author {
                   username
                 }
                 cuid
               }
             }
         }`,
         variables: {
           input: {
             title,
             subtitle,
             publicationId,
             contentMarkdown,
             // replace any unwanted characters like ', ", etc
             slug: slug?.replace(/[^a-zA-Z0-9-]/g, "") ?? "",
             ...config,
           },
         },
       };

       const resp = await $http({
         method: "POST",
         data: reqBody,
         headers: {
           Authorization: apiKey,
         },
       });

       const respData = resp.data;

       if (respData.errors) {
         console.log(respData.errors[0]);
         throw new HttpException(
           RESPONSE_CODE.ERROR_CREATING_POST,
           `Something went wrong creating article. ${respData.errors[0].message}`,
           400
         );
       }

       funcResp.success = "Article created successfully";
       funcResp.data = respData?.data?.publishPost.post as PublishedArtRespData;
       return funcResp;
     } catch (e: any) {
       const msg = e.response?.data?.errors[0]?.message ?? e.message;
       console.log(msg, e.response?.data);
       throw new HttpException(
         RESPONSE_CODE.ERROR_CREATING_POST,
         `Something went wrong creating article.`,
         400
       );
     }
   }
We simply call the hashnode graphql
PublishPostmutation and pass in every necessary properties.As for the functionality for synching notion articles to hashnode, let see how that works.
Publishing Article from Notion to Hashnode 🚀
In other to achieve this, I made sure of the following:
The user has integrated hashmind to their notion workspace.
The notion database exists.
Well what exactly is notion database? This isn’t any sort of Nosql or SQL database 😅.
You could recall that after authorizing hashmind notion integration to your notion workspace, a page was created for you as seen below
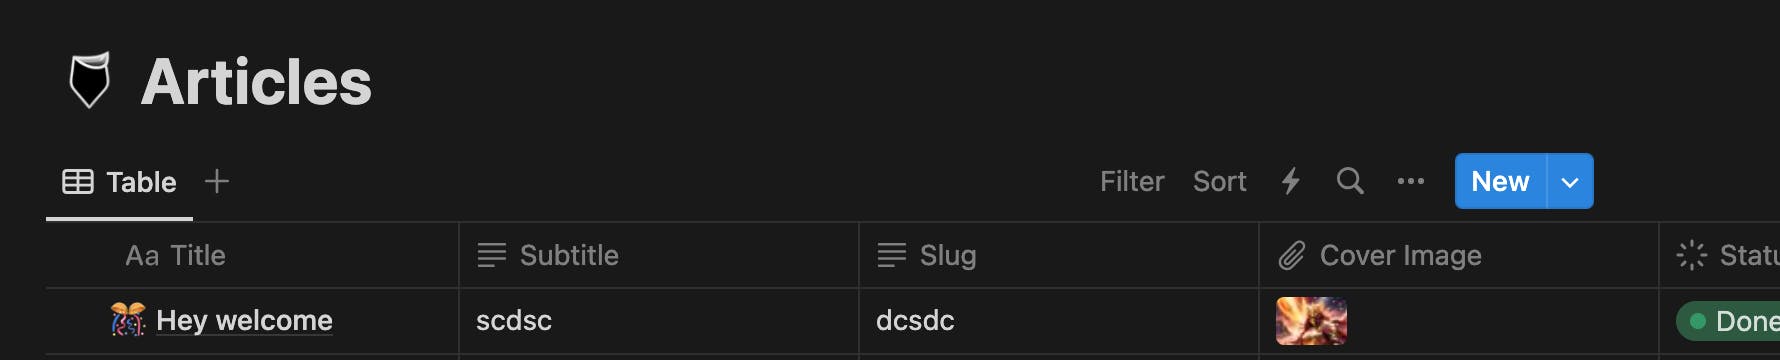
Think of Notion databases as filing cabinets or notebooks. Each database serves as a container, letting you easily organize multiple Notion pages in a single structure. In the picture above, every row of the table is a page within the database "Articles."
Well, how does it work on a code level? I simply did the following:
Fetch the articles from that notion database that has the status “Done”.
 async getDBPosts(databaseId: string) {
     try {
       const response = await this.notion.databases.query({
         database_id: databaseId,
         sorts: [
           {
             timestamp: "last_edited_time",
             direction: "descending",
           },
         ],
         filter: {
           property: "Status",
           type: "status",
           status: {
             equals: "Done",
           },
         },
       });

       const articles = [];
       for (const data of response.results) {
         // @ts-expect-error
         const properties = data?.properties as any;
         const notionContent = this.n2m.toMarkdownString(
           await this.n2m.pageToMarkdown(data.id)
         );

         const slug = properties["Slug"]?.rich_text[0]?.plain_text;
         const title = properties["Title"]?.title[0]?.plain_text;

         articles.push({
           id: data.id,
           title,
           subtitle: properties["Subtitle"]?.rich_text[0]?.plain_text,
           status: properties["Status"]?.status?.name,
           slug: slugify(slug ?? title.toLowerCase()),
           coverImage: properties["Cover Image"]?.files[0]?.file?.url,
           content: notionContent?.parent,
           // @ts-expect-error
           pageUrl: data?.url,
         });
       }

       // return response;
       return articles as NotionDBPosts[];
     } catch (e: any) {
       throw new HttpException(
         RESPONSE_CODE.NOT_FOUND,
         `Notion database not found. Connect hashmind to your workspace and try again.`,
         404
       );
     }
   }
The code above fetches the articles from the Notion database that have the status "Done" and converts them into a Markdown format. It retrieves properties such as the title, subtitle, cover image, and content for each article. The articles are then returned as an array of objects, ready to be published to Hashnode.
Publishing notion article.
Hashmind provides a way to publish notion content to hashnode with just a click of a button. When you navigate to the content page on hashmind, that page fetches all your notion articles you have using the code above. You would notice that an option to synchronize the notion content to hashnode is present, well that just the backbone of you publishing your article to hashnode. Once the button get clicked, it sends a requests with the notion
pageIdwhich was sent alongside the query params, and then we simply invoke the function mean’t for synchronizing the content to hashnode:async notionTohashnode(props: notionToHashnodeType) { const { apiKey, publicationId, notionToken, type, article_id, pageId, databaseId, } = props; if (!apiKey || !publicationId || !notionToken) { throw new HttpException( RESPONSE_CODE.ERROR_CREATING_POST, `Unauthorized, missing api key or publication id`, 401 ); } const notionService = new NotionService({ connection_settings: { token: notionToken!, }, options: { skip_block_types: [""], }, }); const posts = await notionService.getDBPosts(databaseId); const post = posts.find((p) => p.id == pageId); let publishedArticle; if (type === "CREATE") { // publish to hashnode publishedArticle = await this.createPost({ apiKey, contentMarkdown: post?.content ?? "Default content", publicationId, title: post?.title!.length !== 6 ? `${post?.title!} Title` : post?.title!, subtitle: post?.subtitle ?? "", tags: [], slug: post?.slug ?? "test-slug", coverImageOptions: { coverImageURL: post?.coverImage!, }, }); } else { // check if article exists if (article_id) { console.log("CHECKING IF HASNODE ARTICLE EXISTS", { article_id }); const article = await this.getArticleById({ apiKey, id: article_id!, publicationId, }); console.log({ article }); if (article.error) { throw new HttpException( RESPONSE_CODE.ERROR_CREATING_POST, `Article not found`, 404 ); } } publishedArticle = await this.updateArticle({ apiKey, update: { id: article_id!, contentMarkdown: post?.content ?? "Default content", title: post?.title!, subtitle: post?.subtitle ?? "", tags: [], slug: post?.slug, coverImageOptions: { coverImageURL: post?.coverImage!, }, }, }); } return publishedArticle; }This code defines an asynchronous function
notionTohashnode, which takes an objectpropsas its parameter. The purpose of this function is to synchronize content from Notion to Hashnode based on different actions specified in thetypeproperty (either "CREATE" or another value indicating an update).Here's a breakdown of the key components:
Destructuring Props: Extracts relevant properties from the
propsobject, such as API key, publication ID, Notion token, action type (type), Notion article ID (article_id), page ID (pageId), and database ID (databaseId).Validation: Checks if essential properties (API key, publication ID, Notion token) are present. If not, it throws an HTTP exception indicating unauthorized access.
Notion Service Initialization: Creates an instance of the
NotionServiceclass, configured with the provided Notion token and some options. This service is used to interact with Notion.Fetch Notion Posts: Retrieves posts from the specified Notion database (
databaseId) using theNotionServiceinstance.Retrieve Specific Post: Finds the post in the fetched Notion posts based on the provided
pageId.Publish or Update on Hashnode: Depending on the action type:
If
typeis "CREATE," it publishes a new post to Hashnode using thecreatePostmethod.If
typeis different (indicating an update), it checks if the Hashnode article already exists. If it exists, it updates the existing article using theupdateArticlemethod.
Return Published Article: Returns the details of the published or updated article on Hashnode.
As simple as ABC.. the code for updating hashnode article that exists is as follow:
        const reqBody = {
              query: `mutation UpdatePost($input: UpdatePostInput!) {
                  updatePost(input: $input) {
                    post{
                      id
                      url
                      author {
                        username
                      }
                      cuid
                      title
                      slug
                    }
                  }
                }`,
              variables: {
                input: {
                  ...update,
                },
              },
            };

          const resp = await $http({
            method: "POST",
            data: reqBody,
            headers: {
              Authorization: apiKey,
            },
          });
As you can see , we simply made use of the UpdatePost mutation from hashnode.
Frontend Development
While we've only tackled how hashmind works from the backend perspective, it high time we discover how the frontend was built as well. While I can't discuss heavily the whole aspect of the development, I would only cover some of the key crucial areas.
Speech-to-Text 🔊
In order to extract users statement from their microphone, a reusable hook known as useSpeechRecorgnition was created for this purpose. This hook simply uses some of the browser api which are mediaRecorder
and navigator.mediaDevice .
Firstly, The MediaRecorder interface of the MediaStream Recording API provides functionality to easily record media. It is created using the MediaRecorder() constructor. Once you start speaking into the microphone, an event called ondataavailable is fired and we simply listen for that event and append every chunks coming from the media stream which in turn would be used later on.
    const startListening = async () => {
        if (audioContextRef.current?.state === "suspended") {
          audioContextRef.current?.resume();
        }

        const media = new MediaRecorder(stream as any);

        //set the MediaRecorder instance to the mediaRecorder ref
        mediaRecorder.current = media;
        //invokes the start method to start the recording process
        mediaRecorder.current.start();
        let localAudioChunks: any[] = [];
        mediaRecorder.current.ondataavailable = (event) => {
          if (typeof event.data === "undefined") return;
          if (event.data.size === 0) return;
          localAudioChunks.push(event.data);
        };
        setAudioChunks(localAudioChunks as any);
      };
Once you click on the stop listening i.e when the button changes from pause to play icon, I simply stop the media recorder by calling mediaRecorder.current.stop() method available within the useRef hook and then leverage the saved chunk added in memory which in turn get converted into a audio blob format which would be sent to the backend for processing.
Here is basically how the hook looks like:
    export default function useSpeechRecognition() {
      const [listening, setListening] = React.useState<boolean>(false);
      const [browserSupportsSR, setBrowserSupportsSR] =
        React.useState<boolean>(false);
      const [isMicAvailable, setIsMicAvailable] = React.useState<boolean>(false);
      const mediaRecorder = React.useRef<MediaRecorder | null>(null);
      const [stream, setStream] = React.useState<MediaStream | null>(null);
      const [audioChunks, setAudioChunks] = React.useState([]);
      const [blob, setBlob] = React.useState<Blob | null>(null);
      const audioContextRef = React.useRef<AudioContext | null>(null);

      React.useEffect(() => {
        if (!audioContextRef.current) {
          audioContextRef.current = new AudioContext();
        }
      }, []);

      const requestMicrophoneAccess = () => {
        navigator.mediaDevices
          .getUserMedia({ audio: true })
          .then((stream) => {
            setIsMicAvailable(true);
            setBrowserSupportsSR(true);
            setStream(stream as any);
            console.log("Microphone access granted");
          })
          .catch((err: any) => {
            console.log(`Error requesting microphone: ${err}`);
            setBrowserSupportsSR(false);
          });
      };

      const startListening = async () => {
        if (audioContextRef.current?.state === "suspended") {
          audioContextRef.current?.resume();
        }

        const media = new MediaRecorder(stream as any);

        //set the MediaRecorder instance to the mediaRecorder ref
        mediaRecorder.current = media;
        //invokes the start method to start the recording process
        mediaRecorder.current.start();
        let localAudioChunks: any[] = [];
        mediaRecorder.current.ondataavailable = (event) => {
          if (typeof event.data === "undefined") return;
          if (event.data.size === 0) return;
          localAudioChunks.push(event.data);
        };
        setAudioChunks(localAudioChunks as any);
      };

      const stopListening = (
        callback: (data: { blob: Blob; blobUrl: string | null }) => void
      ) => {
        if (mediaRecorder.current) {
          mediaRecorder.current?.stop();
          mediaRecorder.current.onstop = () => {
            const audioBlob = new Blob(audioChunks, {
              type: "audio/wav",
            });
            const audioUrl = URL.createObjectURL(audioBlob);
            callback({ blob: audioBlob, blobUrl: audioUrl });
            setBlob(audioBlob);
            setAudioChunks([]);
          };
        } else console.log("No media recorder", mediaRecorder);
      };

      return {
        startListening,
        stopListening,
        requestMicrophoneAccess,
        blob,
      };
    }
Data Fetching 🪣
For efficient data fetching, I leverage the power of react-query ( tanstack-query ) and Axios. For example the process of sending the audio blob to the backend is done using the useMutation hook from react query.
      const handleTTSMut = useMutation({
        mutationFn: async (data: any) => await googleTTS(data),
      });
This wouldn't invoke when component are mounted on the page or when the page load but would be called by an action, in our case, we simply invoke the hook once the user stopsListening as seen below
    // One of the function sent from the useSpeechRecognition hook
    stopListening(async ({ blob, blobUrl }) => {
          if (!blob) {
            toast.error(`Error recording`);
            return;
          }

          const base64 = await handleBlobToBase64(blob);
          setBase64Data(base64);

          const after = Date.now();
          const diff = after - timer;
          if (diff < 1000) {
            toast.error("Please speak for at least 4 second.");
            setTimer(0);
            return;
          }

          // Mutation hook getting invoked
          handleUserRequestMut.mutate({
            audio_base64: base64 as string,
          });
        });
The handleUserRequestMut.mutate is a method exposed by the useMutation hook of React-Query. This method is used to trigger the mutation defined by the useMutation hook. In the context of React-Query, a mutation is an operation that typically involves sending data to a server to update or create some resource.
When you call handleUserRequestMut.mutate(), it initiates the mutation process. This involves making an asynchronous request to the server, and during this process, React-Query provides various states such as loading, success, or error, allowing you to handle UI changes accordingly.
Final
I believe with this few explanations given, you already have a high level of what the development of hashmind looks like.
But, development phase is more than just technical details; it involves various aspects to ensure my project stands.
Spending an additional 48 hours, I delved into creating a captivating cinematic video trailer and a step-by-step tutorial on utilizing Hashmind. Which took alot of time due to the fact that I was still a newbie in this space.
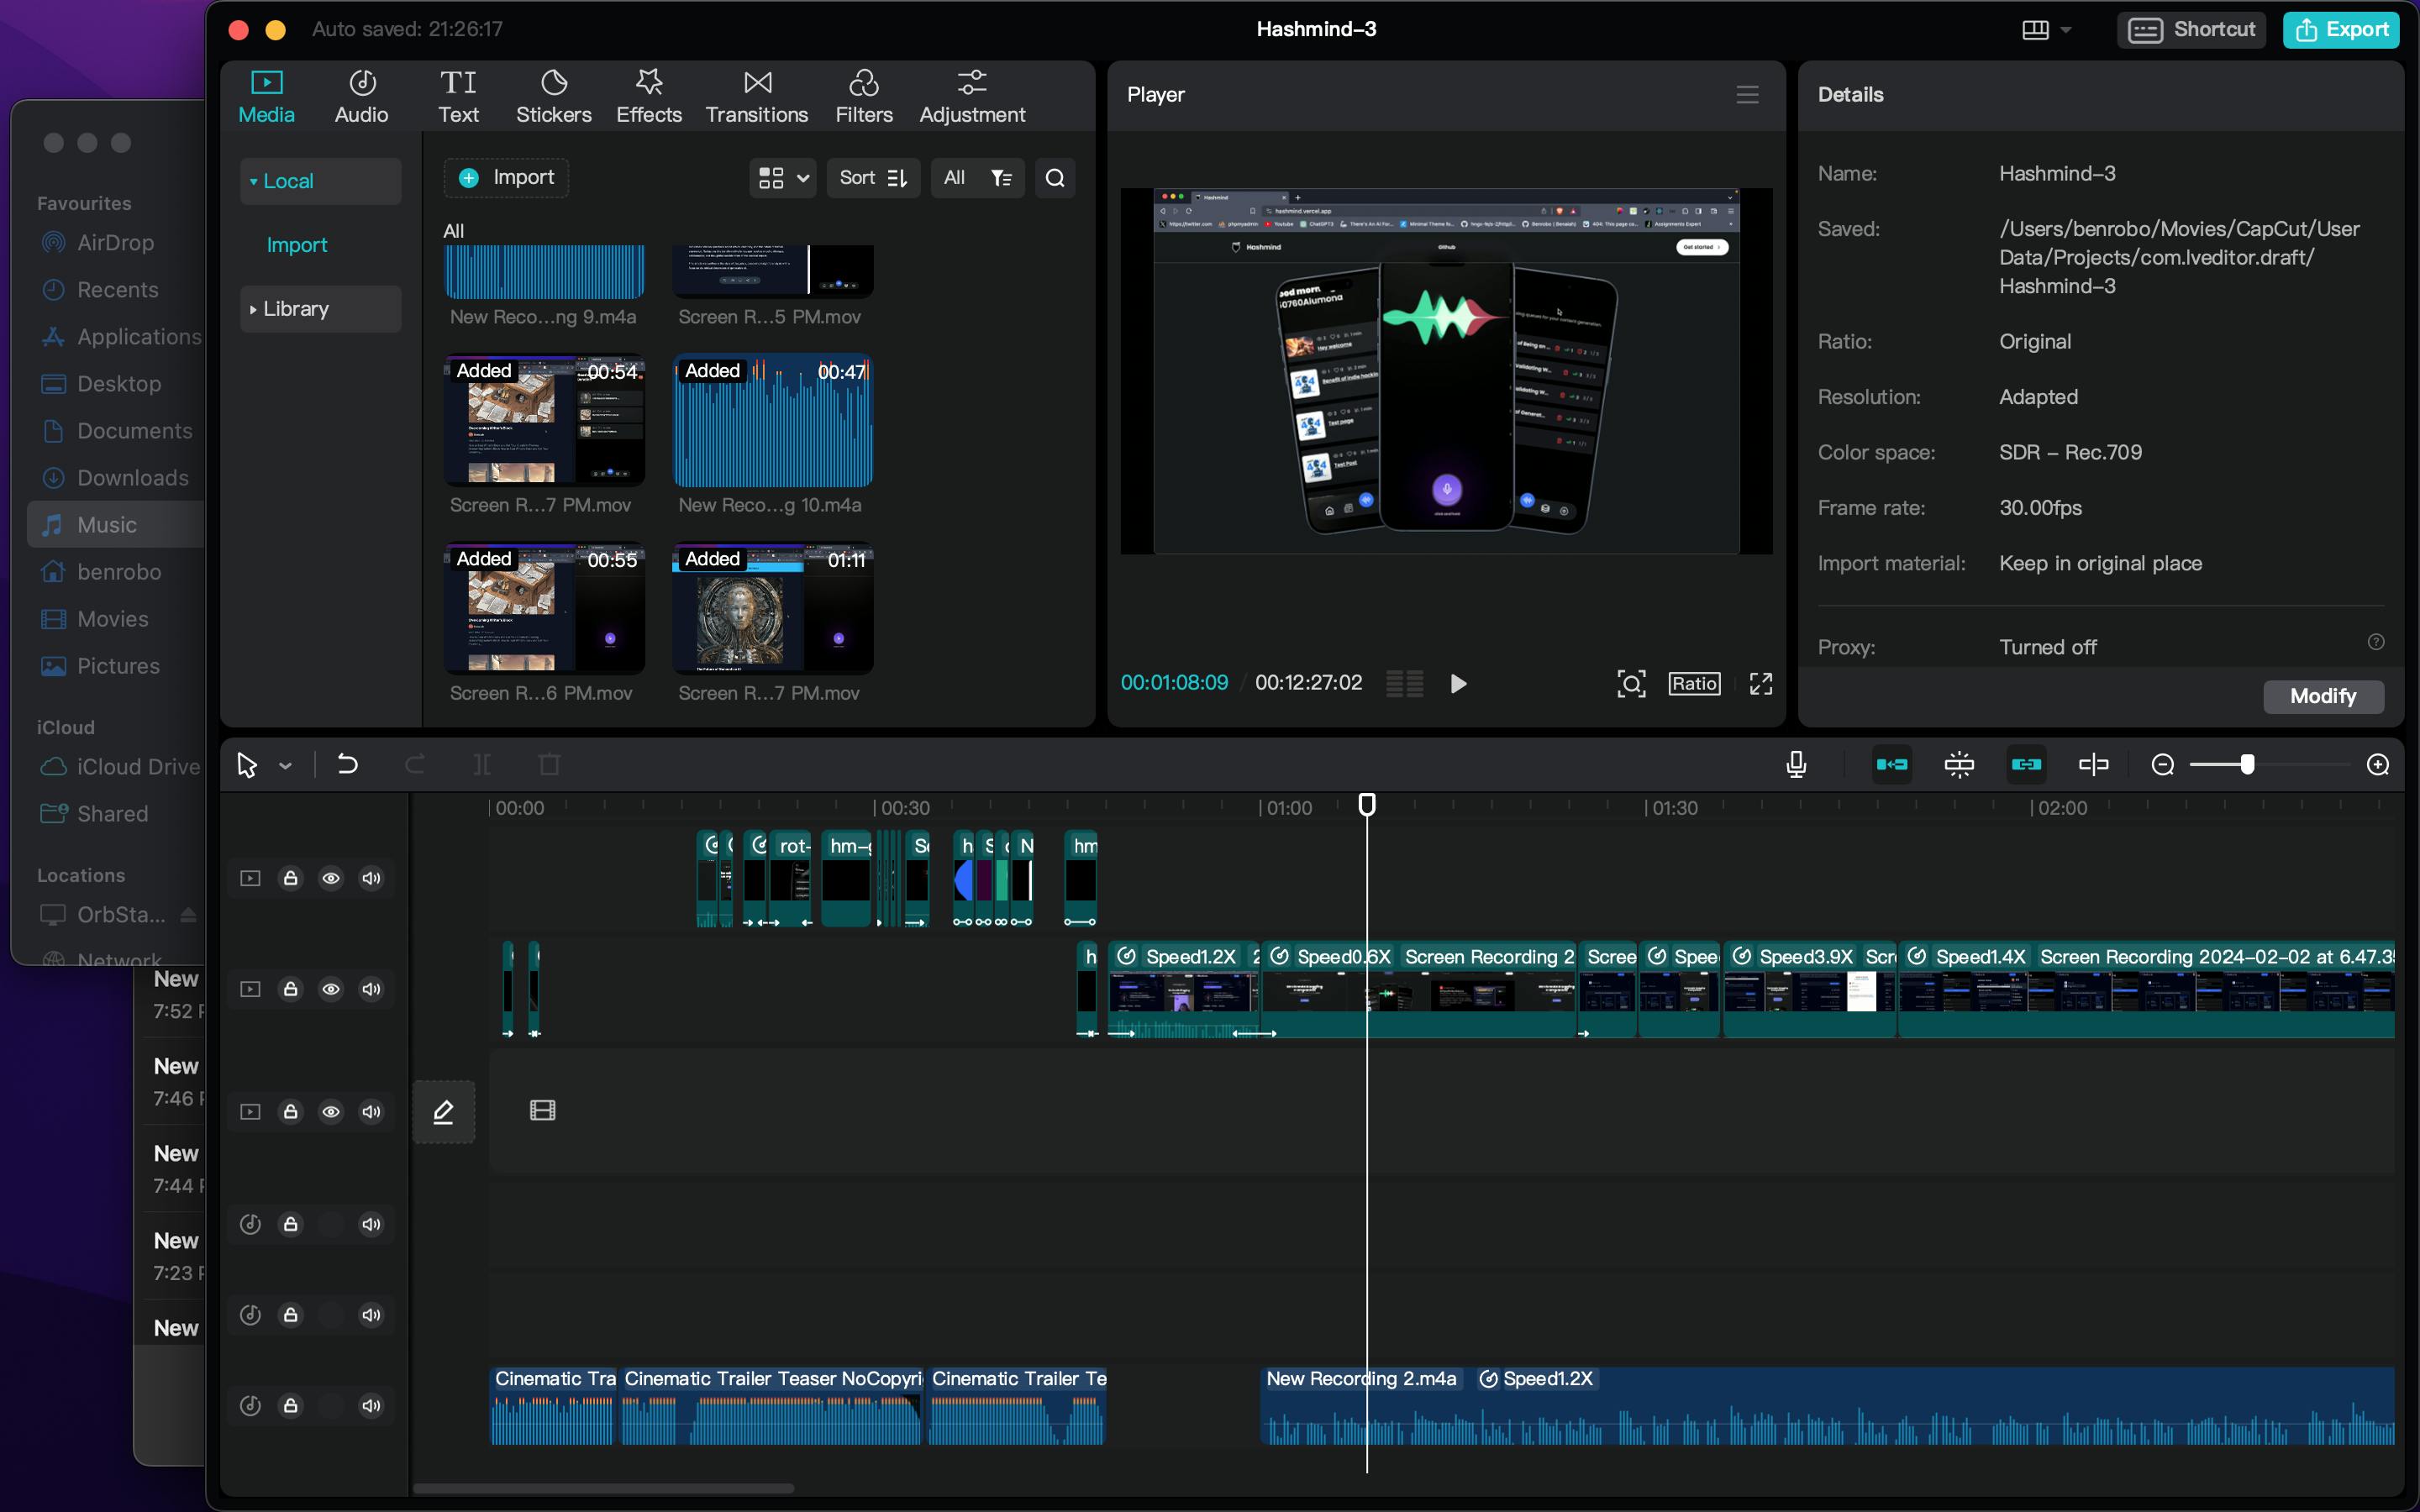
Before coming to the final video for hashmind, I had to remake the video about 4 times when it was 6hrs left to the deadline.
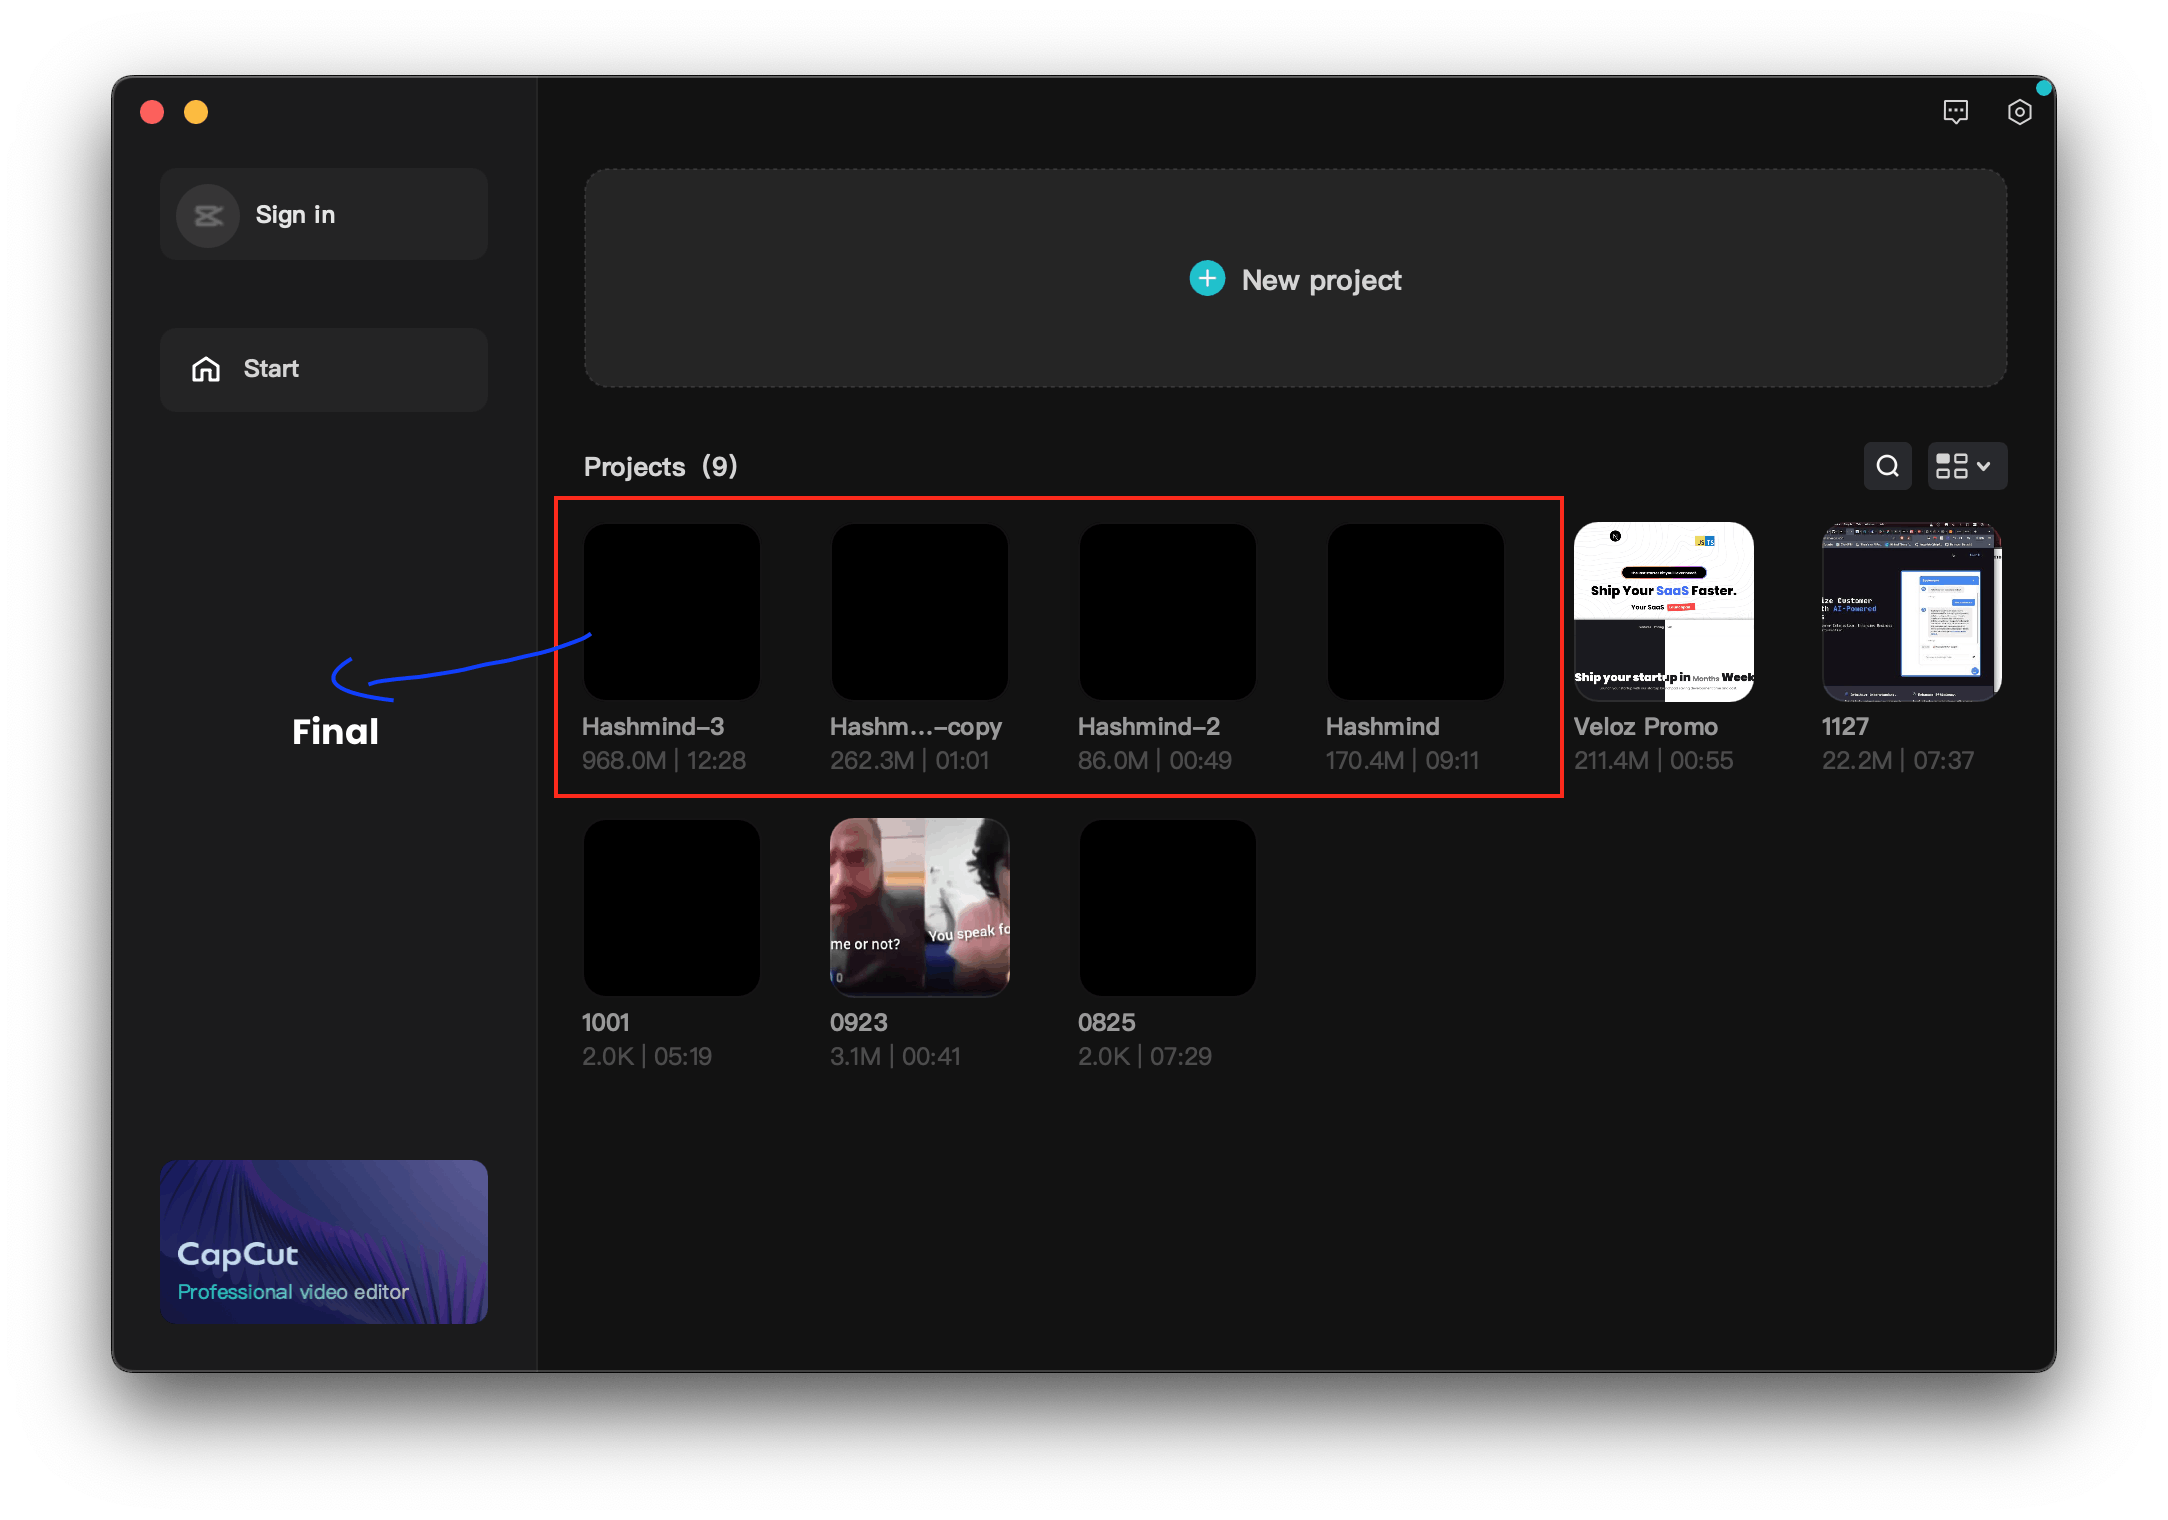
I once thought this would be so easy, boy was I wrong. Video editing is just one tough areas having experienced it today ( as of the time of writing this ) 😅
And that it folks, It been a heck of a ride, but was worth it in the end.

Conclusion 🙏
As I reflect on this journey, I want to express my sincere appreciation to Hashnode for curating an exceptional hackathon experience. This platform not only encouraged technical exploration but also nurtured a vibrant community of innovators. The journey has been personally enriching, pushing me beyond my limits to create something meaningful.
Thank you, Hashnode, for providing a space where creativity flourishes and ideas come to life. Cheers to the fantastic journey and the exciting possibilities that lie ahead!
Github: github repo
Website: hashmind.vercel.app