Tymonial: Ease the process of feedback collection.
Collecting of feedbacks and displaying in form of testimonials, just got easier.

Mission-driven full stack Software Engineer with a passion for thoughtful UI Design, Problem Solving and Building of useful product to ease our day to day lives as a developer. As a software developer, I enjoy using my obsessive attention to detail, my unequivocal love for making things, and my mission-driven work ethic to literally change the world.
The Problem
We all know how unprofessional it is hard coding customers / clients related feedbacks into a web applications. Sometimes, this can also be frustrating, hard coding users feedbacks data into our application.
The Idea.
I recently developed a tool called Baaymax which makes it possible for fellow developers to generate a unique, intuitive and flexible portfolio site right from your github profile using a single command from your terminal. After developing this side-project, I taught about something differently. What if I was able to embed clients feedbacks right into my portfolio web application without hardcoding it with some sort of json data embedded into the project structure?. Because, each time a client gives you a nice feedback, would you go back to that same file, add the feedback there then push our code? Or would you send the client this JSON file to add their feedback? off course, that would look silly on your part. Or would you rather prefer sending them a particular form meant for adding feedback directly into your web app? Am pretty sure, this way would be more convenient for you, making you have full control over what feedbacks get displayed within your web app.
Well, that exactly where Tymonial comes to our rescue.
The Solution.
Tymonial: An easy way to collect users feedback into your web app. Tymonial makes it possible for both Developers and Non-Developers to collect users / customers feedback into your web application and get displayed inform of testimonial.
Tymonial makes the process of collecting feedbacks from clients and customers possible. The days of embedding feedbacks within your web applications are now over.
With little customization using the library, your feedback would be on set.
Video Preview.
A preview on how Tymonial Works.
🔗 Useful links
Not interested in reading the entire article? Explore the website or check out the code with the links given below.
💥 Features.
- Authentication / Authorization.
- Creating of Multiple Templates.
- Collecting of feedbacks.
- Control if a feedback should get displayed or not, on your web app.
- Embed your feedback nicely into your application using the widget library.
🎥 Walkthrough.
Don’t want to spend too much time exploring the website, check out the video below..
I would suggest you make use of
2.5xspeed ratio. This is because of how Istutteralot.
👨💻 Technologies Used
Here is the list of all the tech used in developing this web application.
Frontend ( Deployed on Vercel ).
- React
- Tailwind CSS
Backend ( Deployed on Linode )
- NodeJs
- Express
- Modern ES6 syntax using Babel.js.
- Postgresql: flexible database.
- Prisma ORM: enables working with
relationalandnon-relationaldatabase faster and easier.
Widget Library. ( published to npm )
- Pure Javascript.
- OOP principles.
Let's look into the database schema.
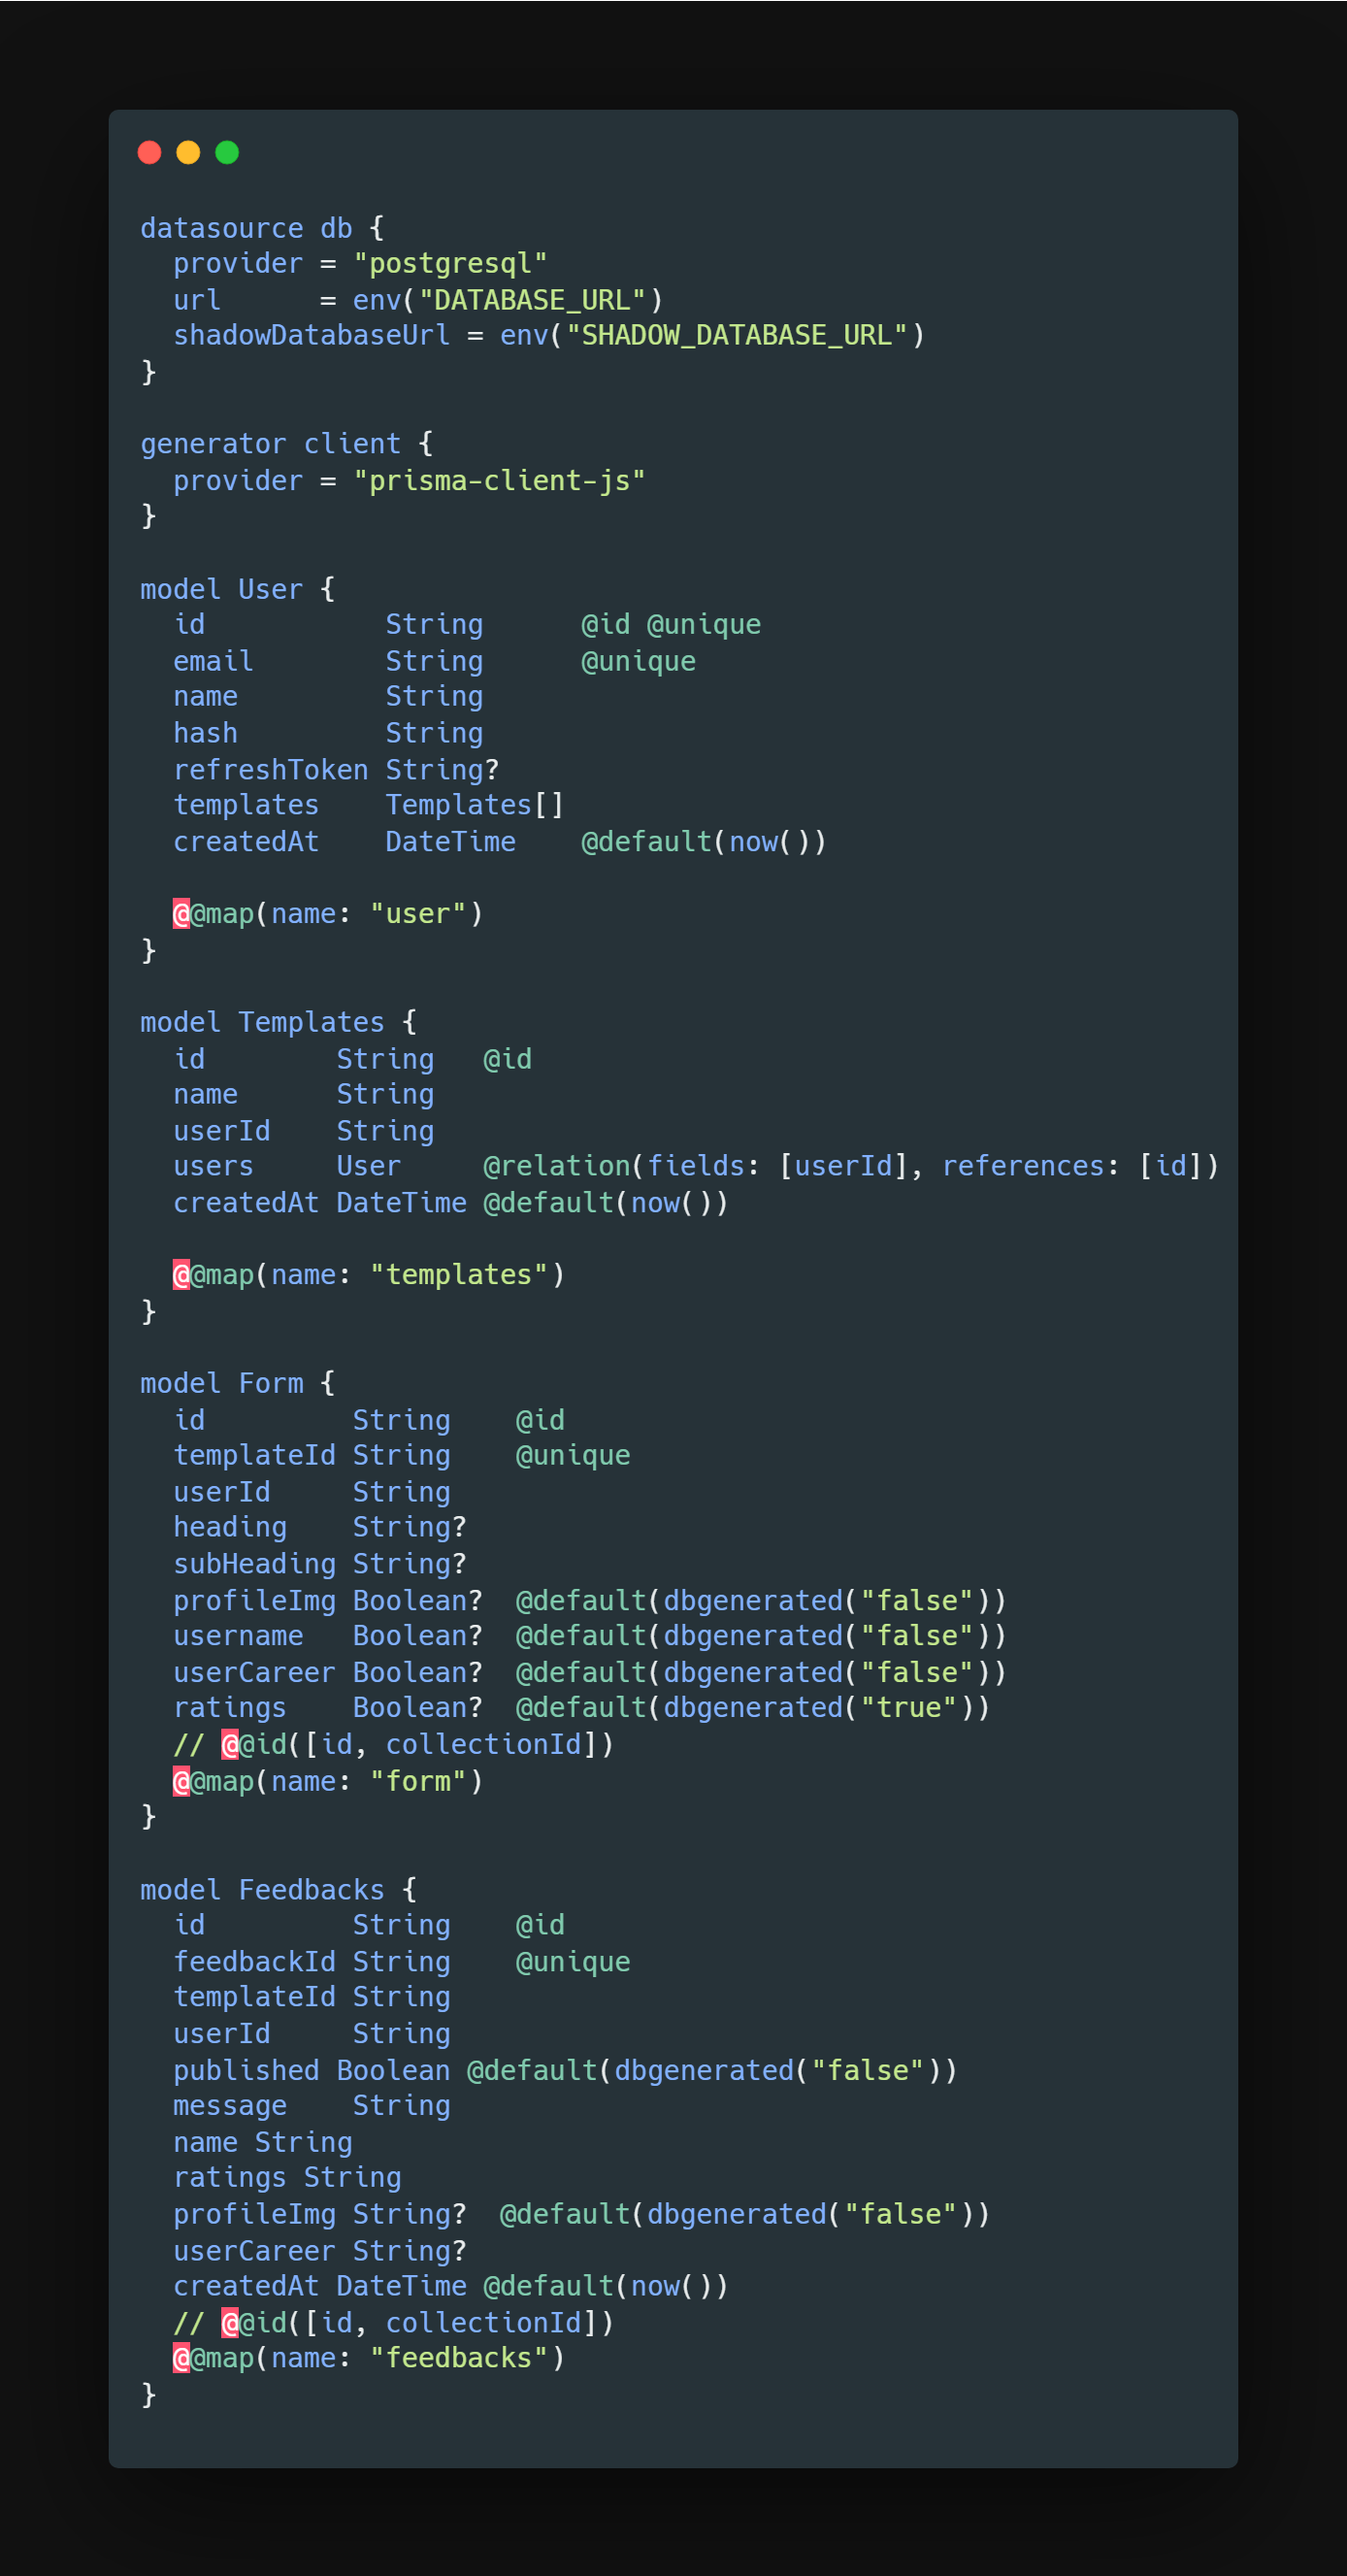
The image above simply describe how :
- Tables should be created using prisma
modelconcept. - How each column should
relateto one another using the@relation()decorator and other related parameters.
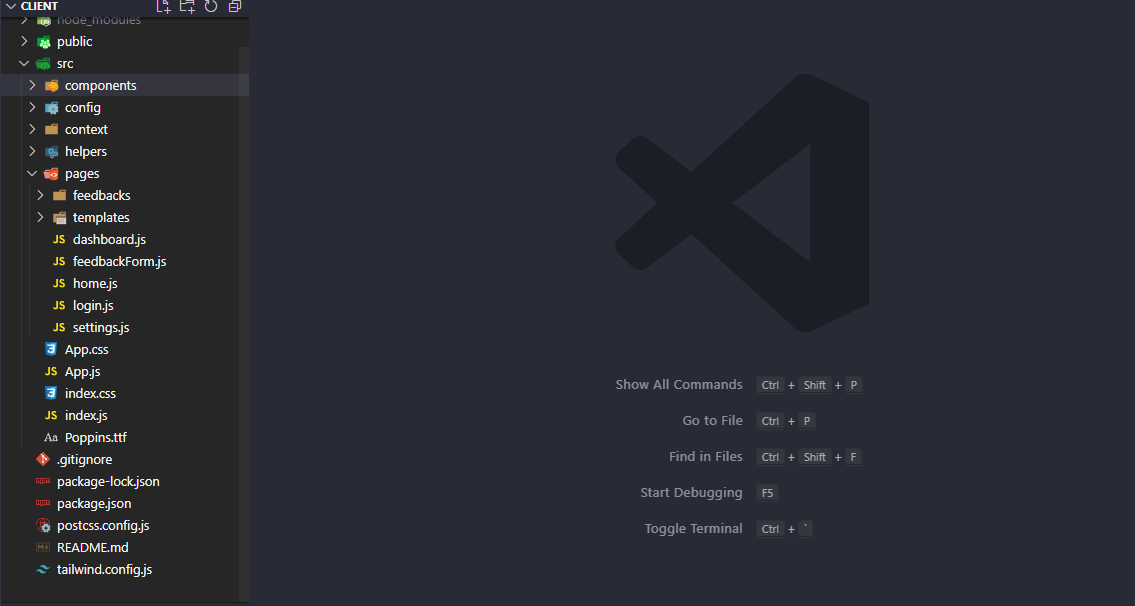
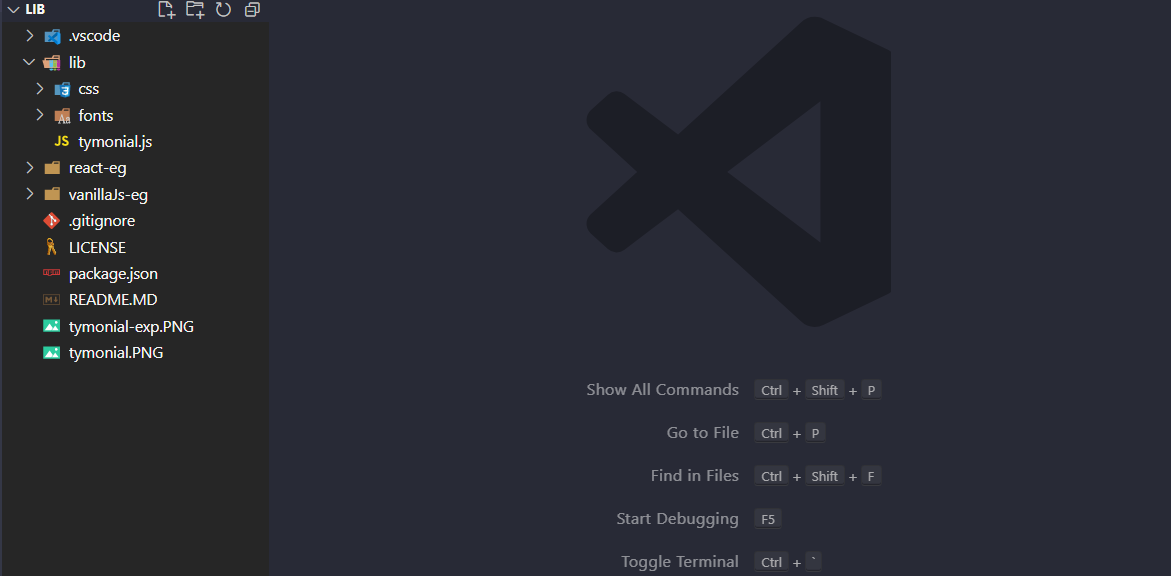
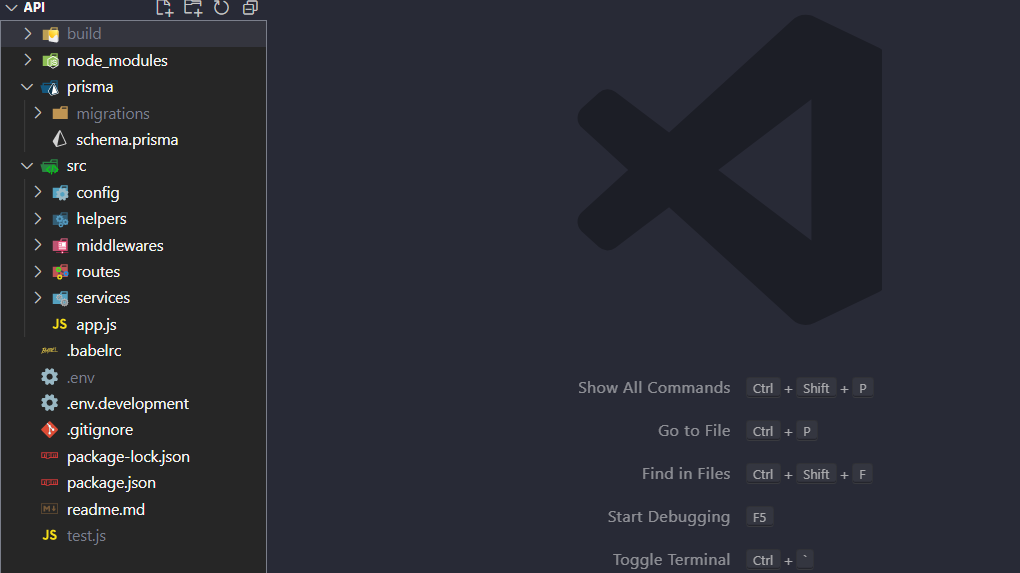
Project Structure.
The image below shows how each projects were structured in order to increase the speed during development.
Frontend.
Widget Library.
Backend API.
Step 1
Create a
TymonialAccount for free @ tymonial.vercel.app.Log Into your a
TymonialAccount for free @ tymonial.vercel.app/login or click theSignInbutton.
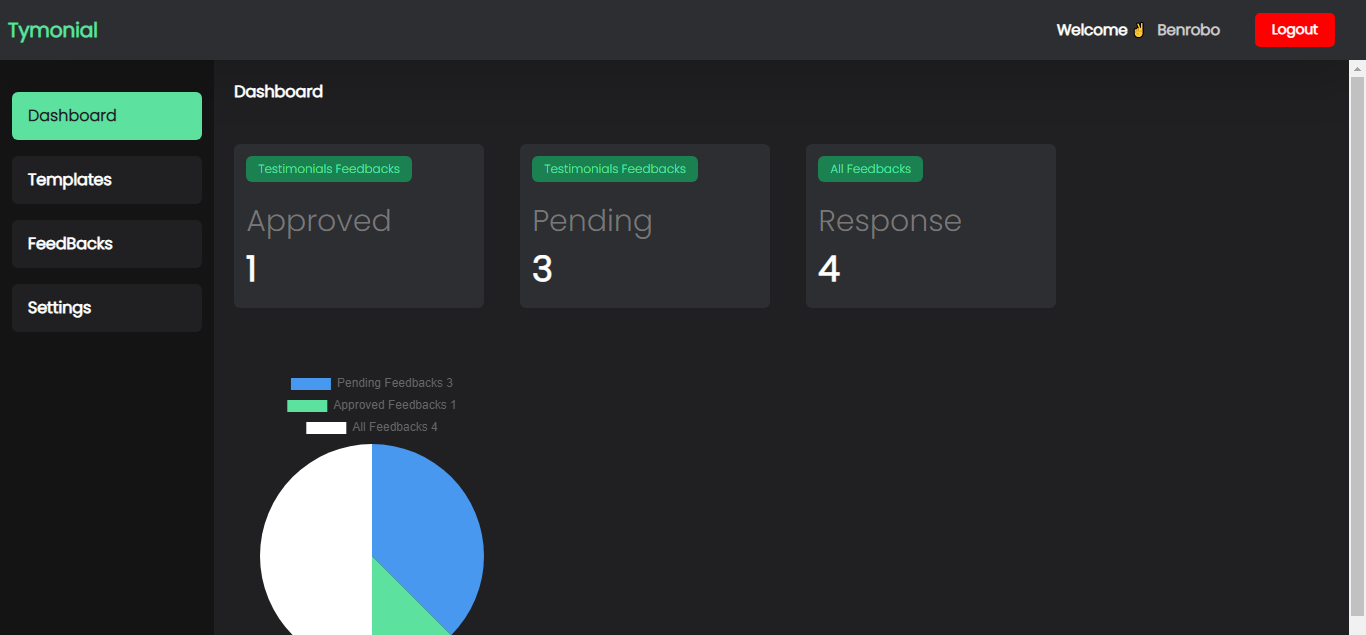
You should be redirected to your dashboard as ASAP ( As Soon As Possible) just like the image below.
Step 2.
- Create a new
Template. A tymonial template is just a way of assigning and categorizing feedbacks from clients. It also provides a way for customization. Simply click on theTemplatenavbar tab, and click oncreate template button.

If template has been created successfully. click on the template name you previously created, an image below should show.
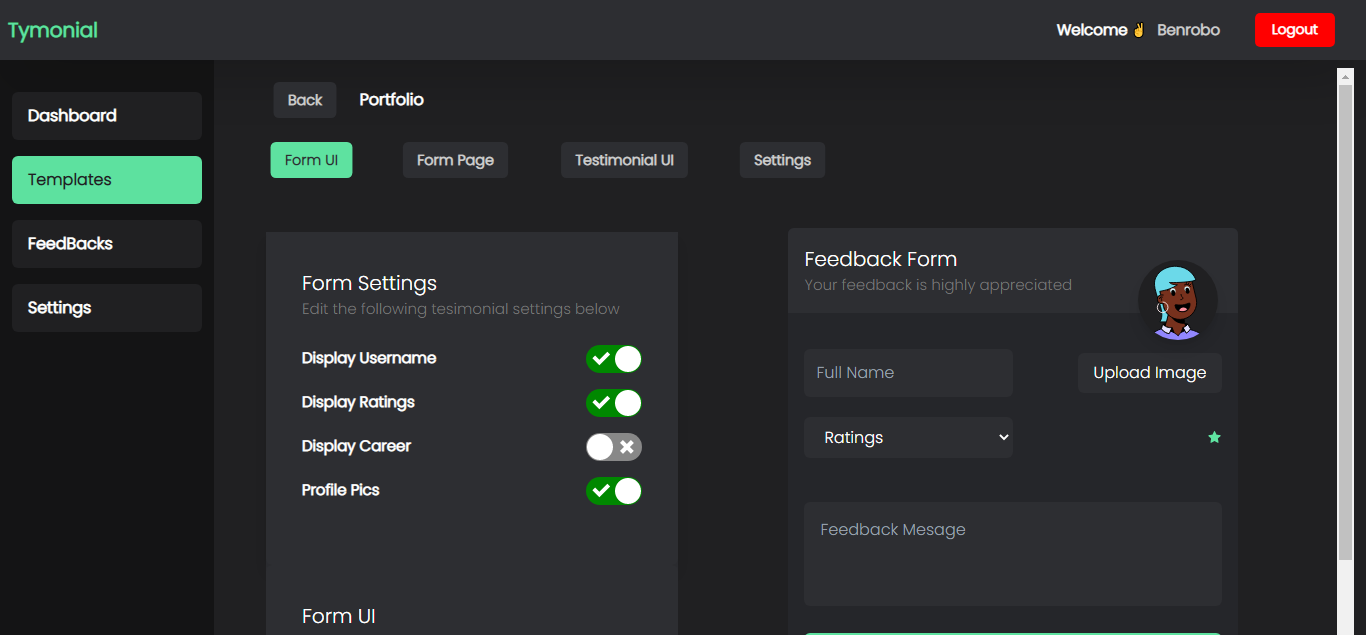
Customize how you want the feedback form to be when given to client to be updated.
Step 3.
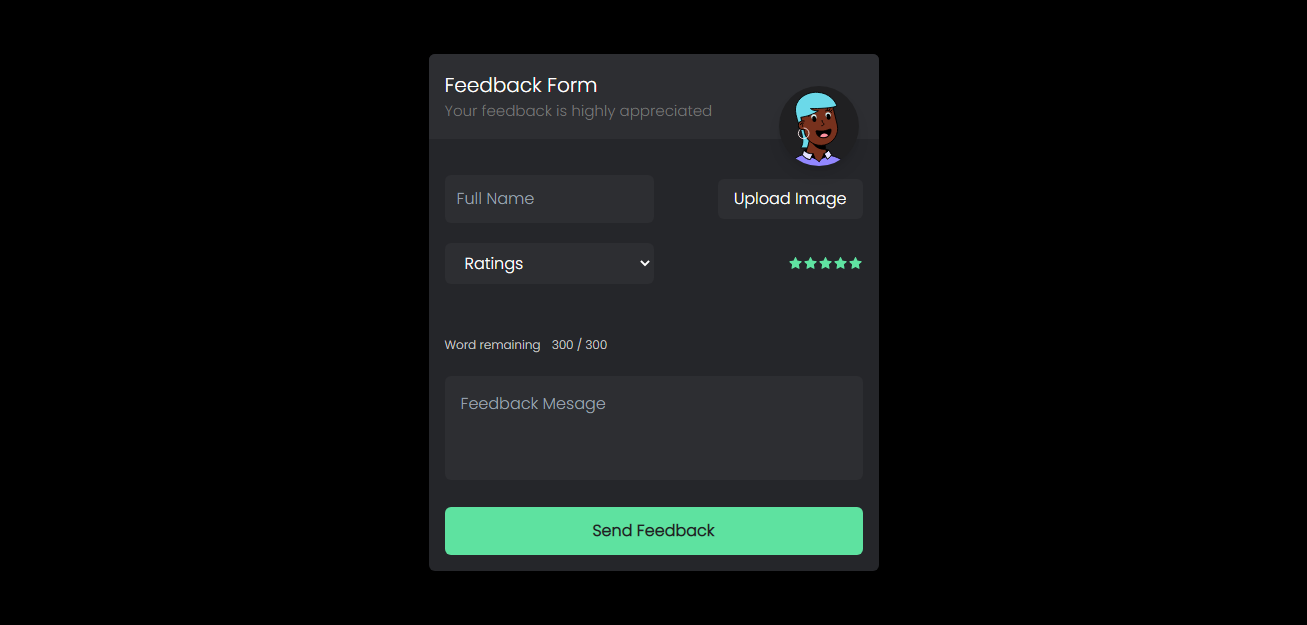
Collect feedbacks from your Friends, Family, Clients, Thanos and so on. To do this, navigate to your template settings tab, a unique URL would be available for you, copy and send this url to who ever you need feedbacks from.
 .
.
Once feedback has been collected, it time to display this collected feedback into your application.
Step 4.
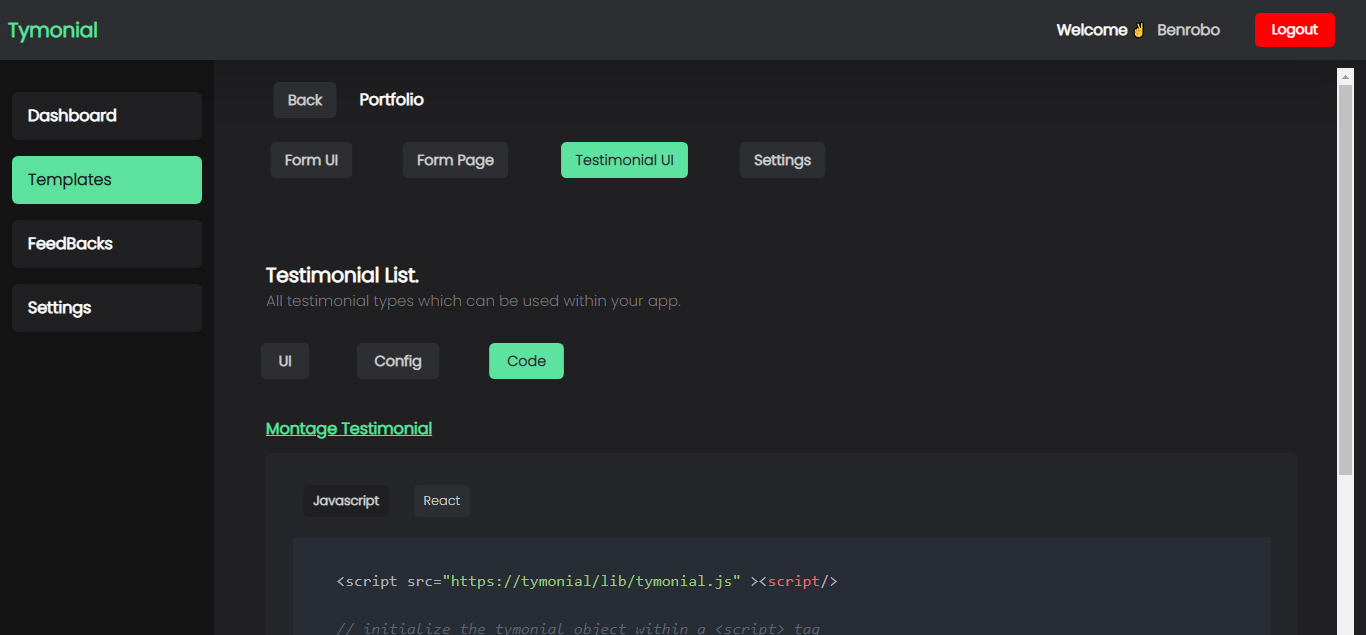
Navigate to the Tesimonial UI tab which can be found within your created Templates. Click on the code section. This display some codes in which you need to copy and embed within your web applications.
 .
.
Step 5.
Integration.
Integrating your Feedbacks inform of a testimonial within your web application can be made possible using the steps mentioned below.
Check out the web application tymonial-app
- Simply copy the
javascriptandcsstags below
Javascript ( Vanilla )
    <!-- Tymonial CSS -->
    <link rel="stylesheet" href="https://unpkg.com/tymonial/lib/css/tymonial.css" />

    <!-- Tymonial Javascript -->
    <script type="text/javascript" src="https://unpkg.com/tymonial@^1.8.0/lib/tymonial.js"></script>
Javascript ( React )
COMING SOON!!!!
- Initialize Tymonial
Initialize tymonial Object within a new <script> tag before the closing </body> tag in your .html file.
new Tymonial({
element: ".example-cont",
user_id: "fa54431c-47e3-443e-907f-65c7e2489344",
template_id: "temp_c112ad",
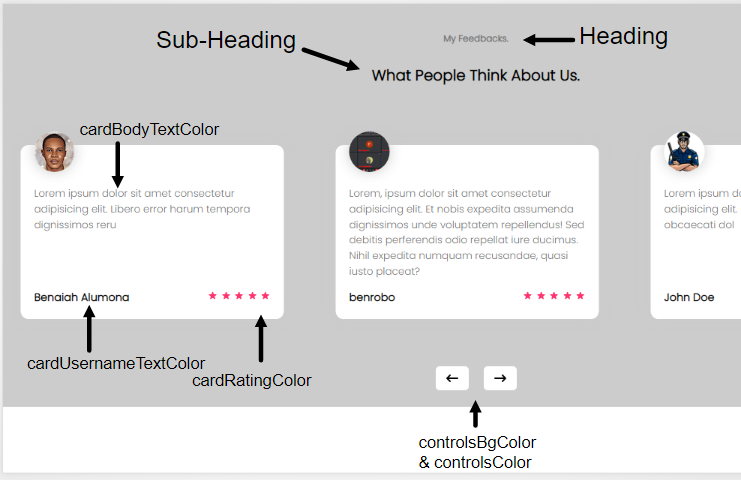
heading: "My Feedbacks.",
tymonialBgColor: "#ccc",
subheadingColor: "#000",
headingColor:"#777",
cardBgColor: "#fff",
cardBodyTextColor:"#777",
cardUsernameTextColor: "#000",
cardRatingColor: "#fd336d",
controlsBgColor: "#fff",
controlsColor: "#000"
})
.init()
Tymonial Params.
Tymonial requires that yiou provide a proper and valid parameters when initializing it. Below shows and explains what each paramenters does.
element: A validHTMLelements.user_id: AUUIDwhich was generated when you successfully registered. This can be found within your tymonialSettingspage.template_id: This contain your template ID which looks liketemp_xxxxxxfor every template created.
If you dont have an account, Create One Here
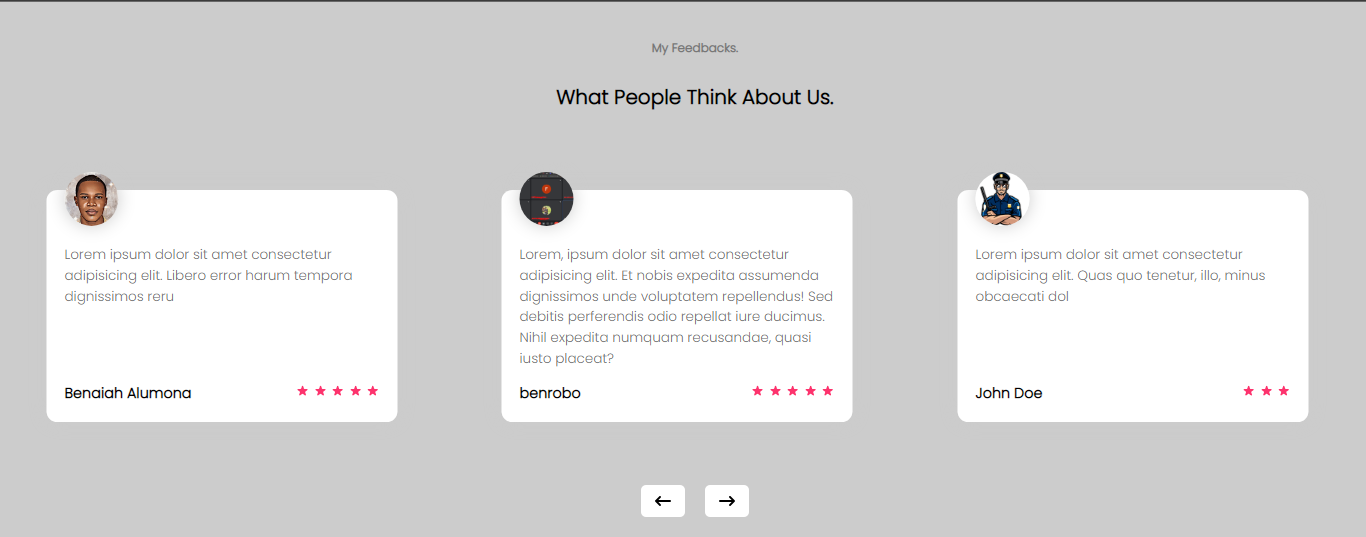
The result should look like the picture below if done properly.
Running Client Locally.
Tymonial is a React based web application. Which means having Nodejs installed is a key in running this locally.
Follow the steps below in setting this up.
Step 1: Clone The repo
git clone https://github.com/Benrobo/tymonial-app.git
Step 2: Move inside the created tymonial-app folder.
cd tymonial-app
Step 3: Install all dependencies.
    # NPM
    npm install

    # YARN
    yarn add
Step 4: Star local development server
    # NPM
    npm start

    # YARN
    yarn start
And that it, you should be ready.
Running Backend Locally.
Tymonial Backend API.
The backend api which powers Tymonial.
Setup
Clone the repo
git clone https://github.com/Benrobo/tymonail-api.git
Install all dependencies
  // if npm is default package manager
  npm install

  // if yarn is default package manager
  yarn add
Create a .env file. Paste and update the created .env file to the variables found in
.env.development
    DATABASE_URL="postgresql://postgres:1234@localhost:5432/tymonial?schema=public&connect-timeout=300"

    JWT_SECRET="some-secret-here"

    MAX_API_REQUEST_COUNT = 500

    NODE_ENV="development"
> Tymonial API uses Prisma ORM for managing Postgresql Database. So it compulsory you have postgresql installed, if not follow the link below on setting up postgresql and prisma orm on your pc
Migrate
schema.prismausing the below command.
npm run prisma-migrate
This would do two things :
It creates a new SQL migration file for this migration
It runs the SQL migration file against the database
Congratulation, you can now start exploring and adding other features 🚀.
Start local Server.
    # start api development server
    ~$ npm run dev
Deployment.
Tymonial Backend is deployed on a Linode cluster. A huge thanks for linode given out $100 worth of credit for this deployment. Without them this wont be posible.
Here are some info from my linode backend deployment cluster.
CPU :~ 2 CPU Cores

Ram :~ 4 GB RAM

Storage :~ 80 GB Storage

Volumes :~ 0 Volumes
Ending Note.
Participating in hackathons are one of the things I love the most, cause you get to show the true power of problem solving using 1's and 0's and Hashnode made this possible. Aside from the stress taken in turning this idea into reality by building this product from the Frontend perspective to logic building within Backend aspect and building of a UI widget Library to deploying this to production using Linode all at once , every time spent on this project were worth it. It doesnt matter what and how the idea may be, but having passion in whatever we do, increase our problem solving efficiency by far.
Also, incase anyone went through some bugs, feel free to open an issue using any of the github links provided above or directly message me.
Thank you Linode and Hashnode once again for this wonderful opportunity. 🙌💖😘


